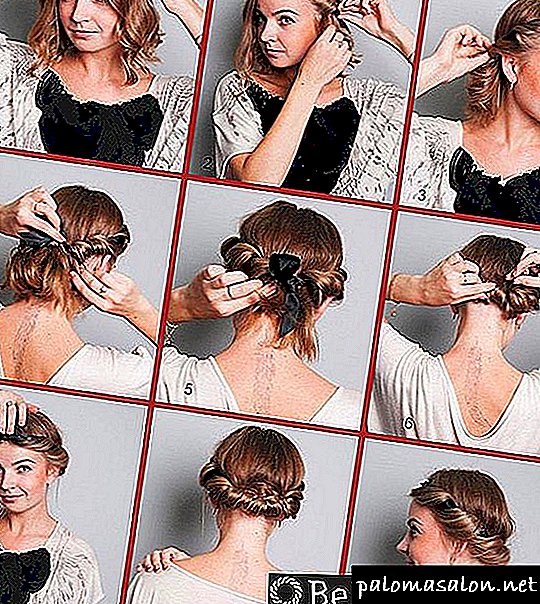
All people tend to look attractive. The first thing that people pay attention to is the human hairstyle. People make all sorts of styling, cutting, curling and coloring in order to look luxurious. The most popular procedure that is able to add a zest to the external image, to make it light and romantically, is the hair dyeing procedure.
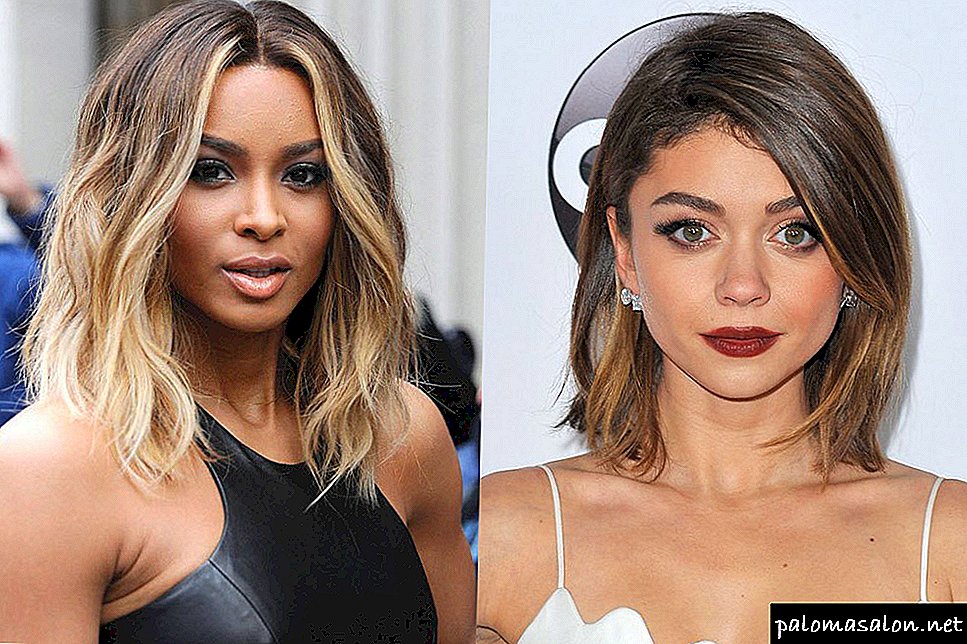
The technique of coloring, which gives the appearance of freshness, brightness and charm, but without drastically changing it, is called highlighting. In the process of performing the procedure, individual strands are colored in color, which is combined with the basic tone of the scalp.
There are many styles and techniques of highlighting strands that are suitable for different types of hair. In this article, we will describe how to do the highlighting of the strands independently, at home, based on the color palette of the hairline.
All pros and cons of self-highlighting
Streaked hair relevant in any season. Coloring strands is suitable for both teenagers and people in years, as it visually rejuvenates a person for several years. In addition, compared with the usual coloring of the entire hairline, highlighting is considered a gentle procedure, as less than half of the strands of the total hairstyle are colored. Before you decide on painting strands, learn the pros and cons of such a procedure.
Benefits of highlighting:
- Visual increase in the volume of hair.
- Emphasizes the facial features and expression of a person’s eyes.
- It is performed for all hair tones.
- Suitable for any haircuts.
- Hides sake or individual gray hairs.
- It gives the image a trendy style and creativity.
Disadvantages of the procedure:
- The hair coat is damaged (even when using gentle paint formulations).
- With the wrong color combination, the result will be unpredictable, perhaps even terrible.
- It is impossible to perform highlighting if the hair has been pre-colored with henna (henna reacts with the coloring composition, which results in an unexpected color: red, blue or green).
- It is not recommended to dye the entire hair a month before coloring the strands and a month after the procedure.
Black hair
Due to the fact that the pigment of black hair is very stable, and when lightening such strands, dyes containing ammonia are used, which causes serious damage to curls, it is best to apply a zonal highlighting style to black tones of hair.
The zone (partial) style is the coloring of the individual upper strands, the remaining curls are not subjected to coloring.
To perform the procedure, the technique of highlighting using foil is perfect. Before you start, prepare the necessary items and tools, namely:
- Coloring composition (it is important to choose a color that will be combined with the basic tone of the hair).
- Matter to cover the shoulders and back.
- Cellophane gloves (medical rubber can be used).
- Cosmetic brush (optimal width, somewhere 2-3 cm).
- Capacity for preparation of the painting structure.
- Foil (sheets 15 cm wide and twice as long as the scalp).
- Hairbrush.
- Clamps for fixing the foil (you can use ordinary clothespins).
Step-by-step instruction:
- Comb your hair and divide it into 2 equal parts, parting from forehead to occiput.
- Separate one strand, put a sheet of foil under it and paint with a brush.
- Roll the sheet of foil in half so that it completely covers the colored strand, bend its edges and fix it with a clip at the base of the roots.
- Repeat the procedure with all the strands that you want to color.
- After application, wait for 20-25 minutes (you can use a hair dryer to warm up the curls wrapped in foil, then the exposure time will be about 10-15 minutes).
- Remove the foil and wash the dye using a shampoo.
- After highlighting, apply a regenerating mask on the hair, this will help to restore damaged areas of the strands.
Dark hair tones
This hairline is best suited American style highlighting of strands. This style is based on creating the effect of curls that have burned out in the sun. When performing it use several tones of the same color of paint.
They start painting from strands, where they use darker tones (or do not paint the roots at all if the natural color is saturated) and gradually go to the tips, using lighter tones.
For the procedure you need:
- Gloves to protect your hands.
- Cape to protect the back and shoulders.
- Coloring compositions of the same color but different colors (3-4 colors are optimal).
- Comb with soft teeth.
- Utensils for the preparation of the coloring composition (as many colors of paint, so many containers).
- Cosmetic brush.
Perform manual highlighting:
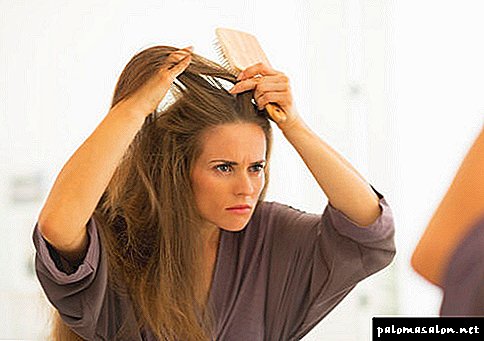
- Comb the hairline thoroughly.
- Visually divide the strands into 3-4 sectors (depending on the number of colors of paint).
- Begin to paint the pre-root zone with a darker color, then the remaining sectors in order.
- After applying the paint, wait 25-30 minutes (it is important! Try to apply the coloring composition as quickly as possible so that the time between the coloring of the roots and the tips is minimal).
- Wash off the hair with shampoo.
- Dry your hair with a towel, and while they are wet, apply a nourishing mask.
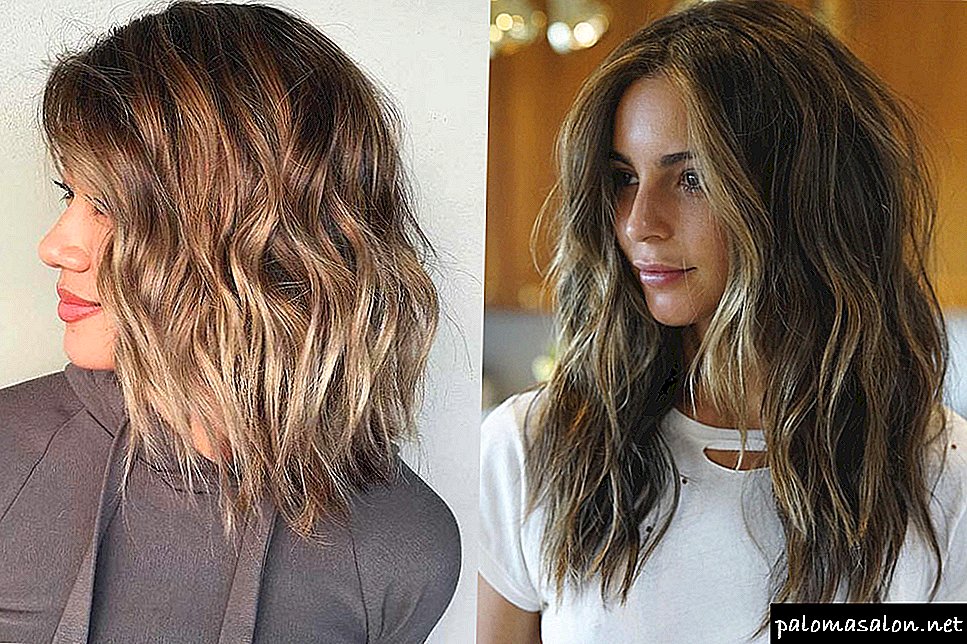
Blond hair
Hair of this color scale, the best style will fit degrad (ombre). It is based on a two-color hair coloring with a contrast or blurred border. The color palette used in staining the degradation is quite large. It uses both brandy and cream colors, as well as bright blue or red. It is best to highlight an ombre (degrade) using a pile technique.
For this you will need:
- Paint two colors, combined with each other.
- Cape on the shoulders and back.
- Gloves.
- Comb (best wood).
- Two tanks for paint dilution.
- Sheets of foil.
- Cosmetic brush.
Walkthrough:
- Carefully combing the hair and covering the shoulders with a cape.
- Divide the hair in half, by creating a pile on them to the area where there will be a transition to a different color.
- Paint the tips, wrap colored strands in foil and wait 25-30 minutes, then rinse with warm water.
- This is followed by dyeing hair from the roots to the transition zone to another color. Apply the composition with a brush, wait 25-30 minutes and rinse your head with warm running water.
- Creating a smooth transition (you can leave a contrast border). On the border between tones put a mixture of colors used in the painting. Sustained for 10-15 minutes, then wash your hair with shampoo.
- Dry the hair with a towel and apply a nourishing or regenerating mask.
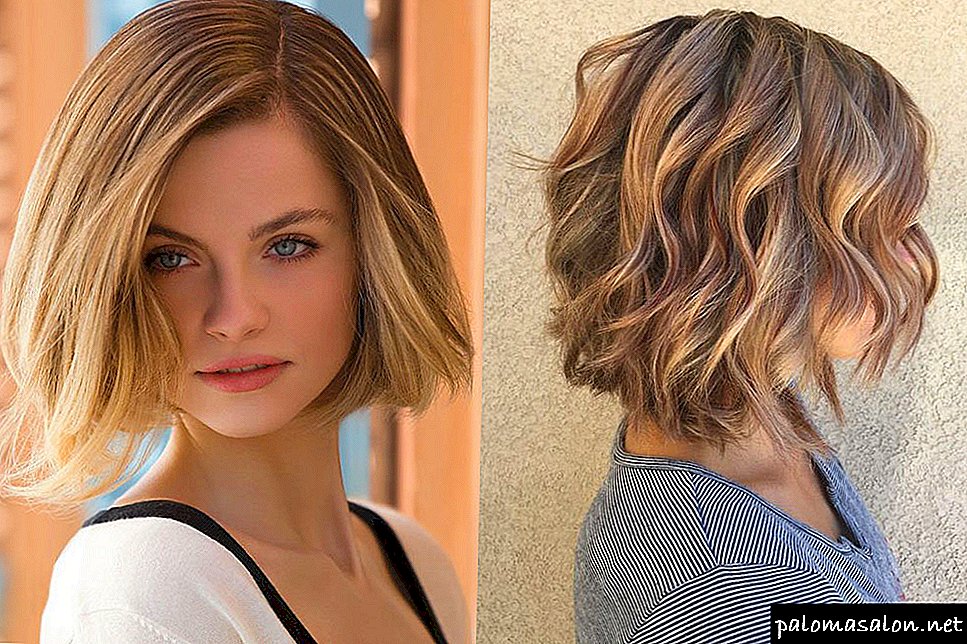
Light brown hair
Holders of light brown hair perfect classic highlighting. It is based on painting the entire length of the strand in one color. The color may be completely different from the hair color, or it may be a few shades lighter or darker than it. The technique of classic highlighting - using a comb-stripper.
For the procedure you will need:
- Stripper (a special comb in which there is a compartment for the coloring composition).
- Paint (must be quite thick).
- Gloves.
- Cape for covering hair and shoulders.
- Normal comb.
Technique for coloring:
- Comb your hair and cover the cape over your shoulders.
- Dilute the paint and tweak it with a stripper.
- Separate the strands and put them between the teeth of the stripper, then stretch the spriper along the entire length of the curls. Repeat the procedure for all strands that you are going to color.
- After applying the composition, wait 25-30 minutes and wash off the composition with shampoo.
- Dry hair and apply a mask to restore damaged areas during dyeing.
Red hair tones
If you made hair dyeing with henna, then in no case can you color the strands, since henna reacts with the paint and the color result will be unexpected (blue or green).
Red-haired people suitable color style highlighting. It is based on the use of two or more colors, combined with each other and the main color of hair.
For staining you will need:
- Cap for highlighting (rubber or polyethylene, in which there are holes for getting strands).
- Hook.
- Paint (multiple colors).
- Cosmetic brush.
- Cape on the shoulders.
- Hairbrush.
- Capacities for coloring compositions.
Phased staining:
- Comb your hair and put a hat on your head so that it fits snugly.
- Start pulling individual strands through the holes using the hook.
- Dissolve the compositions and start applying them to the various strands that you have got through the holes.
- After painting, put a plastic hat or bag on your head to create a greenhouse effect under it and wait 30-35 minutes.
- After the time has elapsed, wash off the paint with warm water without removing the cap. Then remove it and wash your hair with shampoo.
- Dry your hair and apply a regenerating mask.
Conclusion
Highlighting is a procedure that will suit any type of hair, the main thing is to choose the right style and method of dyeing. Above are listed the most popular techniques and styles of highlighting, based on the color palette of hair. With proper observance of all the conditions of staining, the result will be very impressive, not inferior to the work of the master.
Basics of highlighting procedure at home
For those who first decided on the technique of highlighting outside the beauty salon, it would be more correct to start with the simplest variety - the traditional or classical version. This is the coloring of the strands in a single tone, which does not involve lengthy and complex manipulations with the application of paint and experiments with various shades. Fully mastering the classic technique of highlighting at home, you can get a lot of useful skills that can find a place in future more virtuoso and interesting variations - California, French, ombre, shatush and other variations of highlighting, which have become part of the trend directions in coloring.

In order to make highlighting at home, you can buy a set in specialized stores that will facilitate the procedure as much as possible and immediately provide you with all the necessary tools you need to enter:
- composition for lightening curls, corresponding to the natural color of the hair (oxidant 12% - for working with dark hair, oxidant 6-8% - for fair hair and 3-4% - as a more benign option for fine hairs),
- gloves,
- a container of glass or plastic for mixing the coloring composition,
- special brush for applying and distributing paint on the strands,
- foil or cap, depending on the chosen method of classical highlighting at home,
- hairbrush,
- towel,
- clamps.
Armed with all the necessary items, in the next preparatory stage it is important to take into account a few points of a recommendatory nature:
- highlighting it is desirable to do the next or the day after washing the hair, this will not allow the chemical composition of the coloring matter to aggressively affect the hair structure,
- no highlighting after henna staining can be done - this type of natural paint can behave very unpredictably and give the most unexpected, shocking results,
- the repeated application of the brightening compound to the already discolored strands will have a destructive effect — complete dehydration of the hairs and violation of their natural structure,
- When choosing the thickness of each strand, it is worth remembering that thin, numerous polished strands will give a thick head of hair the effect of gray hair, and very wide strips of hair on thin strands look too unnatural.


Master class on traditional highlighting at home using foil
Let's try to figure out how to make highlighting at home by considering the detailed algorithm of actions. At the initial stage it is necessary to prepare a foil for work. The entire foil web is divided into strips, the length of which should be at least 20 cm longer than the hair to be dyed and about 10 cm wide. In special sets for highlighting, the foil is completely ready for use and has dimensions of 10 by 30 cm, which represents a certain convenience and saves time.
On all strips of foil you need to bend the edge of 1 cm, thus forming a small pocket that will not allow the brightening composition to fall on the sensitive scalp and adjacent hair.
The success of the procedure of home hair dyeing with foil will depend entirely on the correctness of compliance with a specific sequence of actions:
- Shoulders are covered with a towel to protect clothing and skin from paint,
- The composition for home highlighting is prepared strictly according to the attached instructions.
- The entire mass of hair is divided into separate zones, which are fixed with clips. Parting is formed for this, and from it there is a division into 7-8 zones (two on each side and 3-4 zones on the central part of the head),
- Coloring can begin both from the lower part of the occiput and from the crown region. In the first case, the movement will gradually be directed upwards, and in the second - from the crown to the bottom. After completion of work with the central area of the head, go to a similar process on the sides,
- A comb with a thin handle separates a strand of hair for highlighting from the head of hair, under which a prepared foil is placed in such a way that the pocket touches the base of the hair,
- Over the entire width of the selected strand, fine strands are also uniformly selected, to which the dyeing composition is applied with a special brush (indented 1 cm from the hair roots),
- The foil is twisted twice and is well fixed by bending it from each edge towards the center,
- The desired coloring shade is obtained after 15-20 minutes of waiting in the case of blond hair and about 45-60 minutes with dark shades of curls,
- Having sustained the necessary time interval, the foil must be removed and thoroughly washed hair. The application of therapeutic balms or masks is an important condition for the preservation of health and beauty of curls, painted using highlighting technique. Also, do not continue to give your hair a strong thermal stress using a hair dryer, curling iron and other devices.


Classic highlighting at home with a cap
It is even a little easier to make highlighting at home through a special cap than with foil. The entire nomenclature of the necessary tools and items remains unchanged, except for the presence of the cap itself with small holes. For hair with a short and medium length of strands (up to 15-20 cm.) Highlighting through a cap is the most optimal and convenient option.

The algorithm of all actions and its sequence are completely identical to the highlighting of the house on a foil, the only difference is that a cap is put on the head, from the holes of which a fine hairbrush gets small strands of hair, which will be further colored.
To achieve the effect of thick and bright highlighting, colored strands are obtained from absolutely all the holes of the cap, for highlighting of average intensity - every second hole is used, and for a light highlighting effect - every third hole.


Home highlighting of shatush for special images, sustained in the framework of the latest dyeing trends
Such an interesting and unusual kind of highlighting as shatush implies the presence of certain experience and skills of self-dyeing hair at home. A beginner should refrain from experimenting with this level of complexity. In other cases, for dyeing using the technique of shatush, you will need: a comb, special clips, a towel, a brush for applying a dyeing composition, a dyeing composition and a hair tinting agent.
- Strands, 1.5 to 2 cm wide, stand out in a chaotic order, are fixed by means of clamps and combed,
- A lightening compound is applied to these fleeces with careless and light hand movements (it is very important to retreat a few centimeters from the hair roots),
- The time that is necessary for the effect of the coloring composition on the hair is no less than 40 minutes, depending on the base shade of the hair,
- After the desired shade is obtained, the coloring agent is carefully washed off the hair and nourishing masks and balms are applied. It is possible to check how ready the planned color tone is with the help of a cotton pad moistened with water, with which a small part of the test strand is wiped.

A few tips and tips for highlighting at home:
- In order to paint, getting on the open skin (neck, forehead, temples), easy to wipe, they should be pre-treated with any cream oily texture,
- Hands must be in gloves
- The coloring composition is used only once, its subsequent use is completely excluded,
- Lightening agent should be applied as quickly as possible so that the final shade is uniform over the entire head,
- The optimal frequency of repeating the highlighting is once every 3-4 months - this interval is very important for maintaining the health of the structure of the hair,
- Dyed hair will need extra care with the help of special nutrients and regenerating agents, as well as a sparing effect from thermal devices for styling,
- If desired, the shades obtained as a result of highlighting can be slightly modified using professional tinting agents.
- In the hot season, bleached hair should be hidden under the headgear, otherwise the original showiness and color intensity will be lost very quickly,
- Strands, painted in the technique of highlighting, the second time no longer discolor. It is worth discoloring only obviously regrown areas of roots.
How to make highlighting at home
There are several ways to make hair highlighting, the most simple and popular: highlighting with foil and highlighting with a cap.
Many women ask themselves: how to make highlighting at home? There is nothing difficult in home coloring, you just need to prepare well for this procedure.
Highlighting hair with foil
Make highlighting at home by using foil. This technology is simple and has long been used. The main advantage of this method is the speed and convenience of applying the composition to the hair, the ability to adjust the thickness and number of strands.
For highlighting using foil you will need:
- Foil. Its number and length directly depends on the length of the hair and the number of colored strands. The foil should be cut into strips, 10-15 cm thick and so long as to fold the strip in half, it would completely overlap the strand in length.
- Fine-toothed comb. It is better and more carefully combing the strands and separates them from the bulk of the hair.
- Capacity for mixing paint. It must be plastic to prevent the oxidation process. Disposable plastic bowls are fine.
- Bleaching powder or highlighting paint.
- Oxide.
- Paint brush.
- Gloves.
Oxide should be selected on the basis of the original hair color and condition, as well as the desired degree of clarification.
For already bleached or dry hair, it is better to choose an oxidant 3%, it will not be too aggressive to affect the hair, but it will not give a strong brightening effect, for a maximum of 2 tones. For clarification of 2-3 tones suitable 6% oxidizer. Oxidants from 9 and 12% significantly lighten strands, depending on the type and color of hair up to 6 tones. Such oxidants should choose dark-haired girls or those who dyed their hair in dark shades for a long time.
As a basis for highlighting there is a paint or powder. The most convenient option would be paint for home coloring: it already has the necessary consistency, you only need to add oxide. Before dyeing, you must carefully comb your hair.
- Step 1: Mix the bleach base with the oxide in a plastic bowl. You can use wooden or plastic sticks or paddles for mixing.
- Step 2: Separate the strand from the bulk of the hair. The rest of the hair to stab or tie a gum, so that they do not interfere.
- Step 3: Put on the strand the finished mixture, starting from the ends and moving to the roots. An important point: you need to retreat from the roots of 1-2 cm, so that the streaked strands look more natural and neat, as well as not to injure the hair follicle.
- Step 4: Fully wrap the strand with foil, taking a little closer to the roots and leaving a margin at the ends. Foil provides the fastest oxidation process. It is necessary to wrap the strands so that there are no open spaces left with paint. It is advisable not to bend the strands strongly when wrapping, for more uniform coloring. According to this scheme, all strands are processed. It is necessary to monitor the indentation from the roots and the thickness of the strands.
- Step 5: Soak the necessary time and thoroughly wash the mixture from the hair. The aging time depends on the initial hair color and the percentage of oxide. For light hair, the time varies within 10-20 minutes, and darker ones should be kept around 30-40, depending on the oxide.
- Step 6: Optional. Highlighting hair at home can be supplemented by toning. Streaked strands can be tinted with paint or tint balm.
The color of tinting should not differ from the obtained tone of strands when highlighting by more than 1 tone, otherwise you can spoil the highlighting.
It will be good if the hair is not washed before highlighting. Due to the protective fatty film that the sebaceous glands create, discoloration will not severely injure the scalp and hair in general.
Highlighting hair with a cap
How to make highlighting with the help of a cap: this type differs from highlighting with a foil only by the selection of strands. For highlighting with a cap you will need:
- Special silicone cap for highlighting. It can be purchased at a specialty store or made independently. It is necessary to make symmetrical holes in the shower cap.
- Paint or powder for highlighting.
- Oxide.
- Gloves.
- Brush.
- Plastic container.
- Hairbrush with a sharp end or something that can replace it.
The process of highlighting through the cap consists in selecting individual strands through the holes in the cap. With the help of the sharp end of the comb, the strands cling and reach the surface of the cap. If you do not have a comb with a sharp end, you can use a knitting needle or a hook.
Interested in hair care? Read here. What hair masks can I use? Useful information in this article.
These strands are dyed and left for a certain time from 10 to 45 minutes. You can periodically warm the strands with warm air using a hair dryer, but do not need to overheat too much.
Highlighting with a cap is usually used if it is necessary to discolor thin and short strands. For thick long hair it is better to choose highlighting with foil.
Highlighting the house can hold any woman without resorting to any help. A good result can be obtained by competently selecting the oxide suitable for the percentage and following all the recommendations for the procedure.
How to properly highlight with foil?

- Throw a towel over your shoulders.
- Prepare strips of foil that should be a couple of centimeters longer than a strand of hair.
- Prepare the dye by mixing the ingredients according to the manufacturer's instructions.
- Split all hair into pieces, pinning it up.
- You can start coloring from any place. Choose a not too thick strand of hair, separating it with a comb-comb.
- Using a regular crochet hook, select thinner strands from the strands and place them on the foil.
- Selected strands on the foil should look like the photo above.
- Lubricate the dyes with dyeing composition.
- Put the next piece of foil on top of the painted strands.
- Stepping back up, down or sideways a few centimeters, select the next strand and do the same.
- Do the procedure over the entire head.
- Wait 15-30 minutes (depending on the intensity of the desired result).
- Expand the strands and rinse them with water without removing the foil.
- Remove the foil and wash your hair with shampoo, then apply a nourishing balm.
- Blow dry your hair, and it is better to let them dry naturally.

The advantages of this technique
With this staining, you can visually increase the volume of hair, their expressiveness, shine and radiance, as well as “mask” the penetrating gray hair, especially manifested in a woman early.

It is also a good way to experiment with your style and image, while not using any radical methods for dyeing strands. Slightly lightened curls will help to emphasize an interesting shape of a geometric haircut, to focus on a short hairstyle. Such staining is very economical - supporting procedures should be done once every two and a half to three months.
Another advantage is versatility. Such coloring will look beautiful on curls, on dark strands, and on light ones. In addition, there are many gentle ways to highlight.

- The color palette of hair colors is very diverse and will cause anyone to get lost.
- Sugar hair removal at home is an excellent solution to remove hair from the skin, which does not require a lot of effort and money, details in the source.
What do you need for highlighting at home?
To successfully carry out home highlighting, a woman will need:
- sterile pair of gloves
- a special bleaching compound (for owners of dark hair, it is good to use a twelve percent oxidizer, for blond hair - six to eight, for thin strands, three to four percent oxidizer will do) or hair dye,
- small brush or paint brush (plastic or wood),
- glass or plastic paint bowl
- cut pieces of foil (they must be from ten centimeters in width, no less than, in length - twice the length of curls), or a special cap for highlighting,
- two combs - with a thin and narrow handle and the most common,
- an old towel (they will need to cover their shoulders so as not to get dirty with paint).
Today, in specialized stores you can already buy whole sets with everything you need for the procedure at home.

It is very good if another person helps. He will be able to process the strands that are hard to see for a woman, which she is hard to reach. If there is no helper, you need to sit between two large mirrors to fully see all the strands on your head.
Highlighting strands with foil
Highlighting with foil at home is an old proven way to do dyeing. The technology is simple: with the help of foil, you need to separate a small strand (its thickness is chosen at will), put it on the foil with applied paint.
After that, the strip is carefully folded in half with the screwed-in side slices. Foil must be firmly fixed on the head - for this you can use clips.
Highlighting strands with a special cap
Another option for highlighting at home is the use of a specially designed silicone cap. It is covered with small holes in a checkerboard pattern. But even the usual swimming cap can be useful for coloring - it only needs to make small holes in an even order.
With the help of the cap it is possible to discolor short locks and curls of medium length.

California highlighting creates the effect of burnt hair, and it can be easily done at home.
First you need to put a hat on your head, draw the strands outwards through the holes in the “headdress” with a comb with a narrow handle. The composition is applied to them for bleaching. Depending on the desired degree of intensity and on the general condition of the curls, it is necessary to hold the paint on the curls from ten minutes to half an hour.
After that, the composition is washed off, the cap can be removed. Hair must be washed after the procedure with shampoo.
California highlights on dark strands
To get this effect, a woman should wash her hair. Shampoo should be soft. Using balms, masks or conditioners is prohibited - it can be done after staining. The curls should dry out (without using a hair dryer - otherwise it will lead to the fact that the strands are strongly fluffed, become porous and there is a risk of burning them when bleaching). Next you need to mix the paint and you can apply it.

You need to start from the top and move down. The paint is applied to the strand, wrapped in foil - they do not need to be tightly “clamped”. The curl is simply crushed in foil. Hold for 15-40 minutes - it depends on the natural hair color and the desired effect. For example, if you lighten the black curls, you have to keep them in foil for a long time, maybe even repeat the procedure.
After removing the foil should wash your hair. On the melirovannye curls need to apply air conditioning, or a mask-cream.
Hair should dry naturally - you can not use a hairdryer. If the effect is not satisfied with the woman, she can repeat the session, but not earlier than in two weeks, otherwise you can greatly harm the hair.
If a woman has a short haircut, then for the procedure, instead of a cap, you can use the usual hairpins.
Folk way - highlighting "in a circle"
It is necessary to cut a circle out of any material, in its center to make a big hole - strands are pulled through it. They are evenly distributed throughout the circle, after which the woman can apply a special composition to them and cover with foil.
At the end of the procedure, wash your hair thoroughly with a mild shampoo and rinse the strands with herbal tea (for example, calendula, nettle, yarrow or ivy).
Sequence of work
You need to start processing the strands from the back of the head, going to the top of the head, and then go down smoothly downwards - process the sides and the front part.
The basic principle of the sequence of movements during the procedure is from top to bottom.

- Gelatin mask is an effective home remedy for black spots.
- Glycolic surface peeling is one of the best cosmetic procedures to make the skin of the face younger, read more in the article.
Tips and tricks for women for self-highlighting
All cosmetologists are inclined to believe that bleaching is best done on stale, dirty curls.

Stylists and colorists discourage women to drastically change the shade of hair without taking into account their color type.
Care for curls after the procedure
It should be remembered that, as the strand grows, it will be necessary to tint the roots from time to time to make the hairstyle look neat.
After the procedure, you should carefully care for the strands, pampering them with various means for colored hair (for example, serums).

Be sure to every week you need to make a nourishing mask. Visiting the pool is not recommended in principle. It has chlorinated water, which negatively affects the curls - even a special swimming cap will not save it. The only way not to harm your strands is to rinse them with cold water before visiting the pool.
Home-made hair is a great alternative to the salon procedure. To conduct a self-session is easy. In addition, it is a more interesting option than full coloring. Several individual locks become discolored, which will make the hairstyle playful, original.
What do you need for highlighting with a hat?
- Coloring composition for clarification of strands on the basis of powder and oxidizer.
- Non-metallic mixing paint bowl.
- A hat for highlighting, which, by the way, can be made independently from a shower cap or a regular package.
- Brush for applying the coloring composition.
- Gloves and towel.
- Crochet hook.
- Comb comb.
How to make highlighting with a hat at home?

- Cover your shoulders and neck with a towel.
- Put on a special cap for highlighting on the head.
- Using the crochet hook, pull the hair strands through the holes.
Weak highlighting involves the use of every third hole of the cap, the average intensity of staining - every second, and the maximum lightening - all the holes in the cap.

California highlight at home
California highlighting is different way of staining. Foil is not used here and the lightening reaction takes place in the open air, which makes the transitions from light to dark as smooth as possible, creating the effect of strands burned out in the sun. California highlights beautifully on long and medium hair and easily performed at home.

How to make a California highlight at home?
- Cover your shoulders and neck with a towel.
- Thoroughly comb hair and divide into sections.
- In each section, choose strands of hair and lightly apply brightener.
- You can paint the strands with a paintbrush or toothbrush, keeping it parallel to the strand.
- Smoothly stretch the clarifier from the tips to the top.
- Apply the clarifier to the strands near the face.
- Dye all the hair and leave the dye for 30-40 minutes, depending on the desired intensity of clarification.
- Wash off the paint with warm water.
Dark-haired girls should tint their hair after dyeing to remove unwanted yellowness. This can be done with a tinted shampoo or balsam.

Dye selection
Before you make highlighting at home, it is important to choose a good hair dye, tailored specifically for your hair. Preference is better to do in favor of dyes for professional use. They lighten hair in a more gentle way, without draining and injuring them. Of great importance is the oxidizing agent. Shop assortment offers you an oxidizer in the range: with a three-percent content of active substances, six and nine percent. In addition, there are still solutions that contain one and a half percent peroxide, but this solution is not suitable for clarification due to its weak effect.


Doing highlighting at home, it is better to choose a middle ground, that is, an oxidizing agent with six percent activity in case the hair is dark and three percent if you have blond or brown hair. For a more gentle clarification, it is better to take a lower oxidizer by percentage, and use it in a higher concentration.
Foil staining
In order to make the hair colorings at home, you will need ordinary food foil. Cut the foil into rectangles of size ten by ten centimeters. Dilute the staining mixture and equip the comb with a sharp pen.
It is best to start coloring with the occipital zone - the hair there is thicker, which means that more time is needed to dye them. Separate the comb with a width of five centimeters, and “sew” it with the tip of the comb. Put the foil under the selected strands and apply paint with a brush. Seal the foil in an envelope, for reliability, securing it with a flat clip.


Lastly, do the staining of the temporal areas - the hairs there are very thin, and there is a chance to burn them with a dye. To control, leave one strand, which you will unfold during the dyeing process, to check what stage the bleaching is at. When the hair is completely brightened, carefully remove the foil and rinse the strands with cool water. In no case do not rinse the hair with hot water: in this case, the pigmentation removal process will not be stopped, and the hair may change its color even after rinsing, or be damaged more than you expected.
Highlighting at home on the foil is convenient in that you can use several tones of paint. For example, you can choose a lighter color on the front strands, and for the rest, mix different shades of the same tone.
Highlighting on the cap
For those who are thinking how to make a highlight at home, applying a minimum of effort to this, there is a great way: coloring through the cap. Special hood can be purchased at a specialty store. Also, you can take a simple dense package of polyethylene and cut it with a knife on one side. A swimming cap will do as well, but in this case it is important to understand that you cannot use it for its intended purpose.

Put the cap on smoothly combed hair. Take a large-sized sewing hook, pierce the cap with a hook and pull out the strands one by one. Make sure that the strand sizes are the same, then the coloring will be more even.
After you pull out the right amount of hair, evenly apply a dye and wait until the hair brightens. For dark hair usually requires two approaches, and blond hair will change in half an hour.
Completion of the procedure
After highlighting the hair has a high porosity, therefore, it is very important to intensively moisturize the hair mask. Wash makeup, apply a balm or mask over the entire length of the hair and hold two more than the time specified by the manufacturer.
To restore the cuticle, it is important to use indelible emulsions after each shampooing. In this case, your highlights will look great for a long time.