Many prefer self-coloring salon. It would seem that everything is simple and there is no reason to overpay the salon for the hands of others and expensive paint. But often homemade coloring spoils the hair, and the effect does not please us at all. Do not give up!

It's all about the mistakes that absolutely everyone who tries to change color at home admit! However, they can be easily avoided. Here are 20 problems and their solution. Study them and painting the house will be easy and convenient!
Mistake number 1: You choose the color from the picture on the package.e
Sorry, but the paint manufacturers do not know what your hair is: thin, porous or hard and "glass". The result of dyeing depends not only on your natural color, but also on the condition of hair, previous dyeing and other factors. Use the shades nameplate, which is usually on the back of the box, to see what this dye will look like on your hair. But rely on it completely!
Mistake number 2: You do not do test staining
Yes, it is a pity to spend money on the whole package, use only a few drops of paint, and throw out the rest. But hair is worse! If you paint everything at once and get a radical black color with a green tint instead of the promised golden nut, the correction will obviously cost more. Choose a small curl from the side of the neck and check on it what will be the result.
Mistake number 3: You do not test for allergies
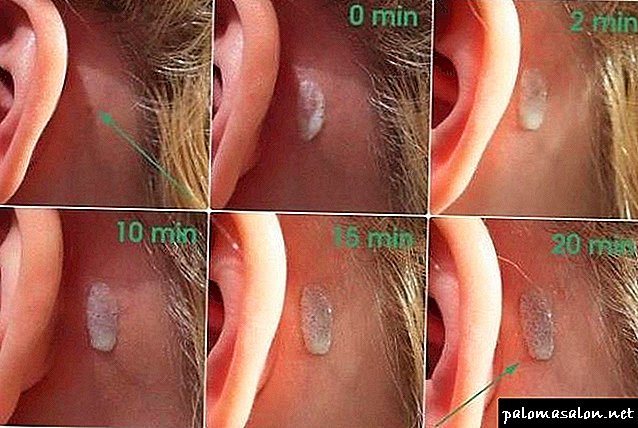
Without exception, manufacturers ask you to first check the reaction to the paint on a small area of skin. But you, of course, rely on luck. In vain! Allergies to paint can manifest in the form of irritation, itching, inflammation and even hair loss! So at the same time with testing on a small strand, check the reaction of the skin to the dye. The site should be selected on the back of the neck or behind the ear: the skin is sensitive and the place is inconspicuous.
Mistake number 4: You do not protect the skin
Painted, and then three days rub the stains from the paint from the neck and ears? Before staining, apply on exposed skin that may be damaged with a greasy cream or petroleum jelly. And no blemishes!
Mistake number 5: Before dyeing you use hair conditioner
Mistake number 6: You do not wash off Stylesng
Yes, you shouldn’t wash your hair just before dyeing, but don’t understand it too literally: if you did complicated styling the day before, using foam, mousse, varnish and gel, be sure to wash it off! Otherwise staining is simply meaningless.
Mistake number 7: You use hair dye for eyebrows and eyelashes
In no case do not paint eyebrows and eyelashes with hair dye - eyelashes can peel off! But this is not the worst: the paint can get into the eyes, which can have serious medical consequences for the eyes. For eyebrows and eyelashes, there are special professional colors, and dyeing is recommended in the salon.
Mistake number 8: You keep the paint longer than it should be, so that the color is more intense

In no case it is impossible to overdo the dye on the hair - it can seriously damage the hair. The dye, remaining longer than that laid on the hair, damages the structure of the hair shaft to a greater or lesser extent, and the dye time is still limited: after 30 minutes (40 in some cases, read the instructions) it just stops working. Burn your hair, but the color will not be better.
Mistake number 9: You wash dyed hair with dandruff shampoos
Special dandruff shampoos have the strongest cleansing properties. And they simply wash away
artificial pigments! If you have a problem with dandruff, use special products that are marked "for colored hair."
Mistake number 10: Do you dye your hair more than two tones darker or lighter than a natural shade

Hair color should be in harmony with your natural color type. If you want a radical change, go to the salon and consult with the colorist: he will select the optimal range (warm or cold), make the right mix of shades so that the hair tone is in harmony with the color of the skin and eyes, and carry out the procedure safely and professionally. Home coloring is not an option in this case.
Mistake number 11: You lighten hair with a powerful oxidizing agent.
Often, when the hair is brightened at home, girls buy a professional 9–12 percent oxidizer and with the applied solution they sit for up to an hour! This is very harmful. A skin burn can produce a severe allergic reaction - so that even more benign dyes will cause allergies in the future.
And the hair turns into tow. Moreover, the color necessarily turns yellow. And then ... on top of applied ash paint.
Mistake number 12: You do not stain the roots.

Bear in mind: the tips of the hair are more porous, and the roots are more dense, so if you immediately apply the dye to the full length, you will get the effect of regrown hair, when the shade seems to be the same, but the roots look lighter.
Mistake number 13: Hair ends are too dark
The opposite effect of the previous paragraph: when the hair color is applied to the entire head at the same time, not only the roots get too bright, but the ends usually turn out darker than you planned. Moreover, this phenomenon is a cumulative property: with each subsequent staining the ends will be darker and darker. Always apply paint first to the roots over the entire surface of the head, and only then distribute it to the tips.
Error number 14: You unequally dye your strands
Well, no you have an eye on the back of my head, no! If you do not have a haircut "under the boy", ask a friend to help you.
Mistake number 15: You put paint on wet hair
And part of the pigments immediately runs down your shoulders. Resistant paint is applied only to dry strands, and, recall, unwashed for about a day.
Mistake number 16: You wash your hair the next day after dyeing

After dyeing hair should refrain from washing the head at least for a day, so that the paint is better fixed. And also do not use hair styling products so that the aggressive components in their composition do not interfere with the absorption of paint pigments. Since the paint itself contains degreasing components, after dyeing your hair is clean and there is no problem to wait 24 hours.
Mistake number 17: You leave the mixture ready to "infuse"
Mixing the paint with the developer cream, you should immediately proceed to staining. The fact is that chemical processes begin immediately after mixing the components, and if you allow the prepared mixture to infuse, the color may turn out dull.
Mistake number 18: You dilute the paint with shampoo or balm

If, when dyeing your hair, it seems to you that the paint is not enough - do not dilute it with regular shampoo or balm! You lose in quality. Try to use the mass sparingly, since I'm sure that it will not be enough, and in the future buy 2 packs instead of one. Life hacking: with an average thickness of hair, you will not be able to do just one bottle if your hair is longer than your shoulders.
Mistake number 19: You use a metal comb
The metal is oxidized and reacts with the paint, in an unpredictable way affecting the result of staining. Use neutral plastic, wooden combs or ceramic.
Mistake number 20: You are painted in blue for a joke (green, red, purple)

Share this post with friends.
Pros and cons of home coloring
The main advantage of home hair dyeing is that you can change hair color within 40-60 minutes without leaving your home. This saves time and money. Just buy paint.
Cons also have:
- inconvenient to paint the back strands,
- need to look for special dishes for mixing,
- a high probability of incorrect color matching, and hence a negative result,
- undyed strands,
- stains from dye on the skin and clothing.
How to choose a hair dye
Choosing paint, consider the following nuances:
- color shade,
- fame cosmetic brand,
- recommendations of experts or friends (reviews on the Internet),
- ease of preparation of the solution,
- color fastness
- staining time
- Is the product suitable for staining at home?
If you only need to refresh the color, use the same brand that you used before.
With a cardinal change in tone, remember:
- if you are a brunette or brown-haired woman and want to become a blonde, then first discolor dark hair and only after two weeks change color,
- hair bleaching procedure is best performed in the salon,
- black color ages, and after 35 it is unlikely to use it.
- dark color emphasizes mimic wrinkles and other skin imperfections.
- gray strands when dyeing in bright red tones will look even brighter.
- check the skin's reaction to the dye. To do this, apply a drop of paint on the thin skin of the hand. wait 20 minutes and see if there is a swelling. If not, you can proceed to staining.
- When buying paint, see if there are gloves in the package and instructions for painting.

The technology of classic monochromatic coloring
Technique monochromatic hair dye is not so difficult to trust its implementation only the hairdresser. In addition, detailed instructions for the procedure are attached to each dye package. So feel free to get down to business. You will need:
- paint,
- brush or sponge,
- glass container
- wooden or plastic stick for breeding,
- cotton pads,
- hand cream,
- hair clips
- two diapers (or something else, preferably old).
2-4 days before painting do not wash your hair. The fatty layer formed on the hair will protect them from the aggressive effects of the chemical dye. Do not worry, it will not affect the result.
It is also not worth wetting the hair before dyeing: the manufacturers have come up with a thick composition that does not flow down the hair and fits well with dry strands.
 How to make hair thick and thick: practical tips and tricks
For more details on choosing a hairstyle for a triangular face, see here.
Stages of hair coloring:
- prepare all the necessary items for coloring,
- fix hair with a rubber band or a clip on the top of the head and grease with fat hand cream the places of possible contact with the paint: ears, neck, forehead. This is necessary in order for the droplets of paint that accidentally fell on the skin, easily washed off,

- divide hair into several parts: occipital zone, temporal lobes and parietal. Pin a bundle of hair clips
- Prepare the paint composition: squeeze out the oxidizer and then the paint in a glass bowl. Stir to a smooth consistency.
- cover your knees with one diaper, and the second with your shoulders,
- put on gloves and take a brush or sponge,
- Capturing a little paint, apply it on the hair roots. Start the dyeing process from the back of the head, and leave the crown and temples for a snack,
- comb each strand with a wooden comb after uniform application of paint,
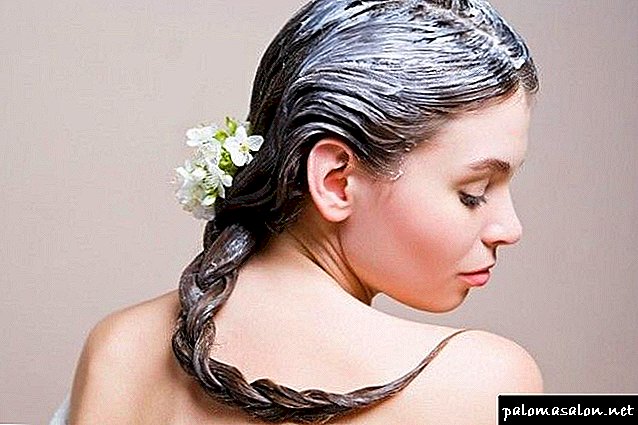
- After painting all the strands, wrap the head with cellophane,
- after a certain time specified in the instructions, wash off the paint with warm water and dry your head with a towel (you should not wash the shampoo for the first time).
You will see the true color in a day. During this time, the hair will finally color up from the inside, and the color will turn out exactly as promised on the package.
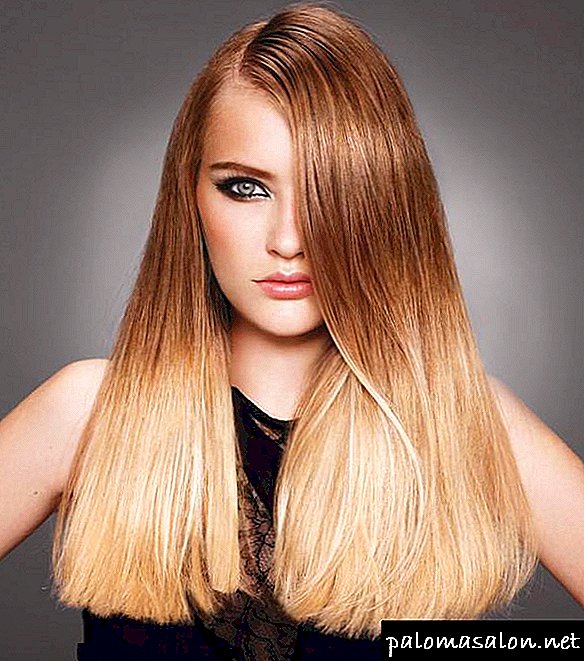
Ombre staining at home
Ombre is a technique of gradient hair coloring, as a result of which the tips of the hair are brightened. If you do not want the hair roots to become copper or light orange in color, you can dye them after the tips are brightened. This step is optional, but it helps smooth the transition from one color to another.
There are two types of ombre: classical and reverse. With the classic version, dark roots and light tips are obtained, with the opposite, light roots and dark tips.
Ombre staining steps:
- Choose a color that blends well with the natural color of your hair. It is best to choose a color that is different from yours by 1-2 tones. As a rule, choose a lighter chestnut color, red, and also light brown. The smaller the change in tint, the more natural your ombre will look.
- Choose a place where the color gradation will end. This is just as important as the choice of color. The closer to the ends of the hair ends gradation, the better. The most suitable place to connect the tones is the chin line.
- Comb your hair thoroughly to evenly dye your hair.
- Wear gloves that are usually included in the paint package. Rubber, vinyl or latex gloves can also be used. It is necessary to not damage the skin of the hands with bleach.
- The process of dyeing begins with hair lightening. To do this, prepare a bleach or light paint. However, keep in mind that the paint will lighten the hair less, and the final effect will be much more modest. The easiest and cheapest way to lighten hair at home is to use a mixture of equal parts of hydrogen peroxide (20%) and powder to lighten hair. Mix 60 g of 20% hydrogen peroxide with the same amount of powder until a homogeneous thick mass.
- Divide hair into strands. First - into 2 parts, and then divide each of them into two more strands. Then once again divide each strand in half.
- Secure each strand with a hairpin, separating it from the rest.
- Hang your hair around the place where you want to start your ombre. Haul will help soften the transition from one shade to another, making it less sharp.
- Apply a brightener from the tips to the intended transition point with a brush. Do this gently, evenly covering all strands.
- With the help of a mirror, make sure that the transition line is smooth. Next, cover with clarifier all the planned areas. Carefully inspect the strands to avoid missing one of the sections.
- Let the clarifier soak. The time for impregnation depends on how much you want to lighten the hair. It may take you from 10 to 45 minutes.
- Check the resulting shade by removing the brightener from a small strand of hair 10-20 minutes after application. If the resulting color suits you, wash the clarifier off completely. If you want to get a lighter shade, leave the clarifier for a while. For easy clarification of hair 10-20 minutes is enough. For a stronger clarification will take 40-45 minutes.
- Wash the clarifier with warm water and then wash your hair with a sulphate-free shampoo. Do not use air conditioner yet.
- Begin to dye the hair after it dries. Split the hair into strands again, fastening them with hairpins. Make as many strands as you like.
- Prepare the paint following the instructions on the packaging. Do this in a well ventilated area.
- Apply paint to your hair. If you are making a classic ombre (lighter hair ends), apply the paint on the previously brightened areas and slightly higher. If you do a reverse ombra, apply the first layer of paint near the dividing line between the bleached and unilluminated areas, and the second, thicker layer - on the ends of the hair.
- Make sure all strands are painted.
- Wrap your head in cellophane or wear a special hat.
- Wait a certain time. Since you bleached your hair before this, you will most likely need no more than 10 minutes. But if you leave the paint for 25-45 minutes, you get a more saturated color.
- Wash off the paint with warm water. After that, wash your hair with a sulphate-free shampoo.Treat your hair with a restorative balm, as lightening and dyeing hair can cause them significant harm.
- Dry and style the hair naturally in the air. This will determine if you have dyed your hair the right color.
Remember that with too damaged hair it is better not to dye them. Brightener and paint will only make matters worse.
Hair care after the procedure
Immediately after painting, it is important not to overdry hair, otherwise they will begin to split. Do not use the hair dryer and curling for several days or pre-lubricate your hair before drying with special foams, mousses, which will protect your hair from exposure to hot air even a little.
If you dyed your hair in a bright color (for example, with red shades), buy a special shampoo for dyed hair. So you keep the color for a long time.
Wash painted hair with shampoo as it gets dirty. Use balms and conditioners for colored hair. In addition, rinse the strands with herbal decoction, 2-3 times a month, apply a mask on your hair. Regular care will give your hair strength and healthy shine.
For an example of coloring an ombra, see the video below.
Conclusion
So, to dye your hair at home is quite capable of any woman. If you follow all the rules recommended by the instruction, take into account all the nuances described in this article, then the process and the result of staining will not cause negative emotions. If you do this regularly, then over time, both experience and skills will come, and the procedure itself will be simple and fast. In general, the conclusion is this: in the salon it is simpler to dye hair, but more expensive, at home it is cheaper, but less comfortable. What to prefer? Choose for yourself.
About household dyes and professional products
What begins the color change? Of course, with a choice of paint. If you are not strong in coloring and hairdressing, most likely, your choice will fall on household dyes, which peacefully and decorously lined up on a supermarket shelf.
In such means the proportions of the components are already laid, all you need is a strict adherence to the instructions and no amateur and witchcraft.
The disadvantage of this dye is that it does not take into account the original hair color and condition, the dyeing process may end in a very unexpected result. For example, in the form of fancy reddish strands or bluish-black instead of the attractive promised "frosty chestnut."
Manufacturers of household dyes offer to make their own hands, not only monochromatic coloring, but also fashionable now Ombre
The basics of color for the "magicians"
Before you do your hair coloring at home, check out the Oswald Circle, which will become your reliable assistant in choosing colors.
It is vital for those who dream of a cold shade of hair, possessing initially warm reddish curls. Such a task to household dye is too tough, but professional paints are capable of almost any changes.
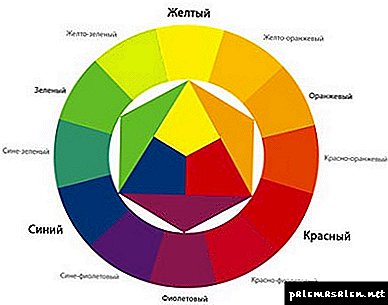
Oswald circle for hairdressers
The Oswald Circle data is applicable when choosing a primary dye and a mixed treatment. To neutralize the color, the mixton is chosen opposite to the color from which it is necessary to get rid of.
Such groups are formed:
- purple - yellow
- blue - orange,
- green - red.
Note! Professional staining can be done exclusively clockwise when driving the Oswald Circle.
From the foregoing, it is easy to conclude that the golden pigment overlaps with red and the red with copper. For reverse action, a decoupling procedure and subsequent toning will be required.
Hairdresser math
Instructions for professional paints may not contain the name of the shade at all and even more so its image, all you can count on is the numeral-letter marking.
In most cases, the color is designated by three figures: the first figure (to the point) is the depth of color, the subsequent ones are color nuances.
The depth of color is usually determined by a 10-point scale, where 1 is black and 10 is blond.
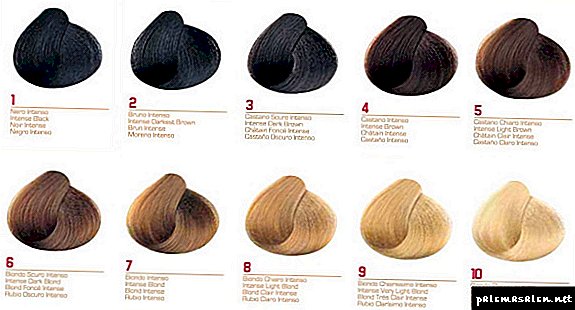
Determination of the color depth by numbering
- paints numbered 10 and 9 belong to the snow-white blond,
- 8–6 light shades from dark to light,
- 5–3 - brown
- 2 - brunette
- 1 is black.
Note! Markings such as “1000”, “12” and “SS” indicate that you have special brightening tones in front of you, which are used with 12% and 9% oxide and imply a brightening of more than 4 tones.
The color nuances are directly related to the Oswald Circle, it is worth noting that the figure to the left will be more significant. While the right will give only a minor nuance.
Coloring without harm
By itself, the dye is not harmful, the danger is fraught with an incorrectly chosen activating lotion, known as an oxigen. Experts recommend to purchase all the necessary components of the same brand.
However, in the absence of the required volume or percentage, substitutions can be made, this rule applies only to ammonia paints.
Choose oxigent, guided by the condition of the hair and the selected shade.
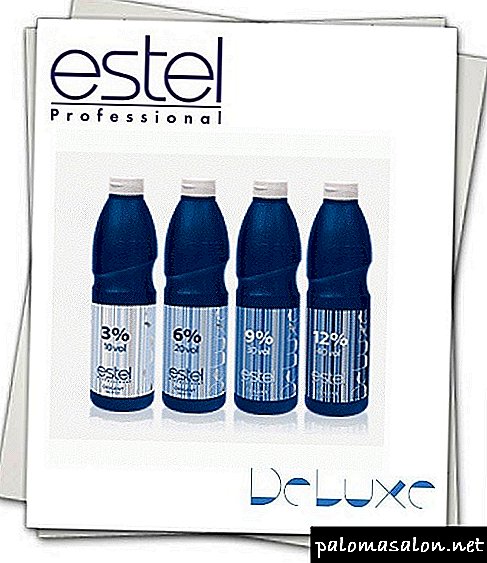
- 3% - for sensitive scalp and tone-on-tone staining. Not able to overcome gray hair.
- 6% - allows you to make changes at a level of 1-2 tones down and 1 tone up. Can be used on gray hair
and when changing colors twice a week. - 9% and 12% - with illiterate use can leave scald scalds. Used when significant clarification is needed.
Coloring secrets
Hair dyeing at home does not require special tools, all you need is convenient glassware, a pointed comb, a hairdresser's brush and crocodile clips for hair.
- The paint is diluted with oxigent in the ratio of 1: 1, deviation from the rule is possible, but only with strong clarification or the presence of a significant amount of a mixton.. If the latter is used in the amount of a full tube (creating an extreme shade of hair: red, blue, green), you will need another bottle of oxygenator.
Note! The volume of the mixton needed to neutralize the pigment is calculated by the rule “12” - subtract the number of the depth of tone from twelve, the resulting number indicates the number of the mixton in centimeters per 60 ml of dye.
If you plan to increase the volume of the coloring mixture, proportionally increase the amount of the mixton.
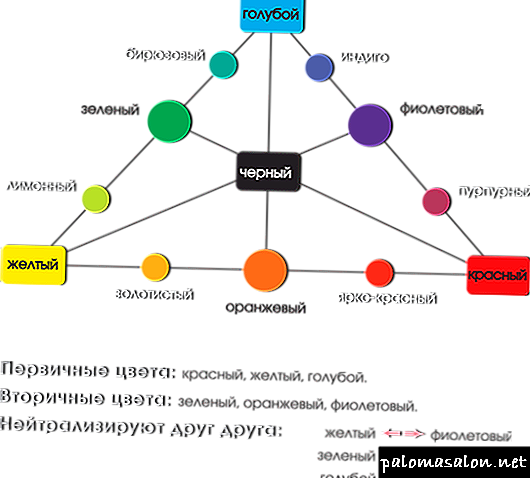
Photo scheme of Acme-Professional mix selection
- The paint is applied to dry dirty hair. Pre-treat the skin on the scalp with petroleum jelly or a greasy cream. In the conditions of hairdressing, this procedure is not carried out, because the masters have a special tool that can instantly remove the paint from the skin.
- The dyeing mass is applied from the roots to the ends and the comb combs having frequent teeth are distributed.

The same principle is used to dye extended hair at home.
- After distributing the dye over the entire mass of hair, they are clamped. When performing a seemingly simple task, many make a mistake - the hair should not fit snugly to the skin, you need to create sufficient air exchange to ensure the correctness of the chemical reaction.
- 5 minutes before the expiry of the time indicated in the instructions, emulsify the paint. To do this, apply a small amount of water to the hair and foam it thoroughly, this will help the paint to be well distributed throughout the entire mass of hair.
- To remove the dye, it is recommended to use shampoo marked “for colored hair”.

Shampoos and balms for colored hair can be found not only in professional brands, but also in the mass market category.
Important! If you paint regrown roots, paint is distributed over the roots and leave for 30 minutes. As time passes, moisten the entire length of hair with a spray bottle, and comb a thick comb to distribute the previously applied paint.
Bug work
There are many mistaken opinions that are rooted in the minds of women, which means that it is time to dispel them.
- The color on the paint box will be identical to that received. It is important to understand that the result depends on the source material - naturalness and hair color.
- Allergy test - a waste of time. Valuable carelessness - your health, and maybe life. For the test, a small amount of the product is applied behind the ear, on the back of the neck, or inside the crook of the elbow.
- Increased staining time gives a more consistent result.. No, it does not! All you get is damaged, lifeless hair, especially when it comes to the use of a high percentage oxygenator.
Hair dyeing with professional paint at home should take place with strict adherence to the manufacturer's recommendations regarding the exposure time
An exception to this rule is hair with a large amount of gray hair, when they are dyed, add 10 minutes to the time specified in the instructions.
If you are not satisfied with the result. Experts do not recommend double staining, you can only re-take a brush and a tube of paint after 12-14 days.
Independent color change is a very complicated process for a non-expert, however, if your soul requires a change "here and now", use the video in this article, which is a full-fledged instruction in this difficult task.
Should I dye my hair at home: advantages and disadvantages

Thanks to modern means, change hair color it became much easier (and more efficiently): cream paint is easier to use, it has less ammonia and peroxide. Painting takes little time.
The dye gives the hair a rich color and mirror shine, leaving the hair incredibly healthy, and the new conditioners from the package of paint restore the cuticle after dyeing. But is everything as simple as it seems at first glance?
Benefits:
- all that is done in the cabin is done on its own, but for less money,
- It is not only easy, but also a quick way to get shiny curls,
- you can change hair color according to moodrather than wait your turn in the cabin,
- a huge variety of brands and colorsranging from natural hues to incredible colors like blue, red, green or purple,
- wide range of options for temporary and permanent staining.
Disadvantages:
- variety of shades incasting doubtmaking it difficult to choose
- wrong color spoil the whole impression, and the following staining can be done not earlier than in 2 weeks,
- often hair dyeing leads to disastrous resultsthat have to be corrected in the cabin,
- hair thickness, skin tone and current hair color affect unpredictable results.
And finally, hair coloring - the procedure is easy, but labeled. The effects of using paint may be on the towel, on the clothes, on the sink and on the floor.
Rules for hair coloring at home
Before you start painting, make sure that the bathroom (or other room) well ventilated. Hair dye is a rather harmful product, so air must circulate freely around the room.
Several rules will help to achieve a level not worse than the salon:
- You can not ignore the instructions. Details may differ from the usual information, if only because modern technology can reduce the time of staining.
- You can not wash your hair with shampoo before and immediately after dyeing. Ideal - wash your hair for 24 hours before the procedure and 48 hours after painting.
- The conditioner helps to “seal” the pigment of a new color and prevents fading, and also adds a healthy shine.
- The composition of the first thing is applied to the hair roots, then distribute them over the entire length.
- Heat opens the hair cuticle. If you warm the old towel and wrap it around your head after applying the paint, the pigment will be absorbed into the hair even more reliably.
 If you want to change the color from dark to very light, you first need discolor hair, then apply a toner or gradually move from your color to the desired one.
Exists universal rule for dyeing any type of hair: the desired color is obtained if you choose a paint that is 2-3 tones lighter or darker than the natural hair color. Anything that goes beyond this range looks unnatural and pretentious.
However, dark and light hair have a different texture, respectively, the result will be different:
- blonde hair very porous, so they will absorb and retain any pigment, and the color will be the same as on the box,
- dark hair have a dense structure, so the color will be more saturated and deep.
Before dyeing, you can check hair for porosity or get rid of it by applying the procedure of deep conditioning, and then read the precautions.
Precautionary measures
Hair dye manufacturers have stopped using harmful compounds and replaced them with new ingredients. but allergic reaction dyes are still capable of leading to irreversible reactions. Before proceeding to staining, consider the following recommendations:
- Do not leave the paint on the head longer than necessary,
- thoroughly wash not only the hair, but also the scalp,
- wear gloves when applying hair dye
- carefully follow the instructions on the packaging of hair dye,
- never mix different hair colors,
- Spend time on the test before applying the dye.
To test the body for an allergic reaction, it is enough to smear the paint behind the ear and do not wash it off. during two days. If there are no signs of allergies (itching, burning or redness at the test site), a dye can be used.
Necessary tools and devices
If you keep the necessary tools ready, you do not have to waste time searching for them.
Here are a few things you will need:
- disposable gloves so as not to get your hands dirty,
- petroleum jelly or fat cream in order to prevent skin staining,
- comb with wide teeth for even distribution of paint residues,
- hair clips or clothespins for fastening towels or oilcloths,
- 4 hairpins,
- a bowl,
- a mirror in order to monitor the uniformity of paint on the back of the head,
- brush in order not to apply paint by hand,
- timer,
- two towels - one on the shoulders, the second to wash stains.
There is nothing worse than damaged clothes. An old shirt, a T-shirt and a bathrobe, which is not a pity to be thrown away or the oilcloth on the floor will eliminate trouble in the “home salon”.
With a very simple technique of dyeing hair in ordinary home conditions can be found on the video:
And yet, not to forget, step-by-step instruction:
- Mix the paint in a bowl according to the instructions.
- Divide the hair into four parts, parting in the middle.
- Twist each piece in a bundle and secure with a barrette.
- Apply a moisturizer or petroleum jelly along the hair growth from ear to ear through the forehead.
- Wear gloves.
- Dye your hair, starting with the top strands. To do this, you need to detach one of the tails and apply paint, distributing it only on the roots.
- As soon as the last strand is colored, apply the remaining paint over the remaining length and comb the hair with a comb. So the paint will fall more evenly.
- Roll the hair in a bun and wrap the head with a towel.
- Turn on the timer for the time specified in the instructions.
- After half of this time has passed, comb your hair again.
- Rinse hair thoroughly with warm water and apply conditioner.
Hair must dry naturally. The chemical composition of the dye and so caused them significant harm, so a hairdryer or other styling products will only make it worse.
Types of dyes for hair
Every hair coloring at home begins with a choice of dye.Now we are not talking about a particular brand or price category, we are talking about types of dyes. Thus, all hair dyes are divided into four types:
- Persistent
- Semi-resistant
- Toning (tonic),
- Natural (on the basis of natural and vegetable components).
You can dye your hair at home by choosing one of four options, but the effect in each case will be different, drastically or slightly. Persistent paint is needed when a girl is going to make a serious change. Completely change the color to the opposite or be completely beaten by gray strands.
In this case, you need to clearly understand what you are doing and act with extreme caution, because the persistent means contain strong active substances and wrong actions can greatly harm the health of the curls. But if you dye your hair properly, this paint will give a lasting effect and a good result.
The second option is also designed to thirst for cardinal changes, but paints hair 2-3 times a month. Semi-resistant paint is less dangerous and will not harm your hair. At the same time, this option has the necessary stability and is not washed out after 4-5 shampoos.

Tonics are used in three cases: when you need to dye your hair yourself, only by changing the shade (brighten or darken), correct unsuccessful painting or experiment with some color. Toning dyes are washed out after 4-5 shampoos.
As for natural dyes, there are many in nature, the most common is henna. This is a sparing method, safe, but you can’t call it a full-fledged painting, it's more like dyeing hair at home or even tinting. However, these tools also have a healing effect.

What do you need for painting at home?
To paint at home, you must have a number of things. First of all - the paint, and to choose a quality product, you should not save. Prefer known or popular brand, even better if your friend used this paint.

Pay attention to the packaging of the selected product and read the annotation. Some options have additional effects or are designed for a specific type of hair (second rarity). If you are often beautiful and the paint is right for you, use the products of one company, so the lower the risk of running into a fake or get an undesirable effect if the tool does not suit you.
To paint, you need a special brush comb. Usually, this tool is offered complete with paint, but it is better to purchase it separately, choose exactly what you like. Of course, you can dye your hair without a brush, taking a sponge or other suitable material, but this will significantly complicate the process and the final quality.
Buy a special plastic cape to avoid getting dirty during the process. Take any fat cream. Apply along the contour of hair growth, on the neck and ears, so you will avoid unwanted skin coloring.

How to dye your hair yourself - important tips
To dye your hair at home without problems and undesirable consequences, follow the recommendations and rules below:
- You can not mix in the purchased paint, regardless of its value and brand, foreign substances. Even if it is a useful oil or a balm that has always suited you, the effect is unpredictable.
- Always read the instructions on the box with paint, clearly adhere to the temporary instructions and better wash off the dye before over-exposure, you risk "burning" the vegetation on your head.
- Paint can only be used on the day of its preparation. If you have bred a remedy, but something has prevented you from using it on the same day, it is better to throw it away, especially when you need to dye your hair with professional paint at home.

- At each painting, wear rubber gloves, fit the most common medical. This way you can avoid paint that has eaten into the hands and is not washed off for weeks.
- If you decide to dye your head constantly, it is worth taking as a rule the use of special care products for curls, these are all kinds of conditioners, balsams and shampoos for dyed hair.
- After painting, try not to wash your hair for 1-2 days, so that the dye gets stronger into the hair structure and does not wash off longer.
- Before starting the procedure of transformation, you need to make sure that everything is in order with the scalp, there are no damages, irritations, microcracks and other things. This is true even when you just need to dye the hair roots yourself.


Painting process
In order to properly dye your hair is nothing complicated, you need to adhere to the above tips and be consistent. Let's start the coloring itself, which fits into 4 steps:
- To dye long hair independently or short is equally simple, the difference is only in the amount of material expended and some dexterity. Before the process begins, it is better if the head is unwashed for 1-2 days, the head must be combed and not wetted, the head must remain dry.
- After you have brightened up your beauty, put on gloves, a cape and took a brush, we proceed. It is necessary to apply the paint on the hair, starting from the roots and moving further along the entire length. At the same time divide the hair on the strands, so the dye falls evenly and you do not miss anything.
- Carefully read the instructions on the package and pay attention to the time, it is better to wash off the paint before spoiling your hair and then restoring it for a long time.
- If you want to get a lasting and bright effect, you should not wash your hair immediately after painting with shampoo, it is better to rinse the curls thoroughly with running water without sparing time.
Balayazh in blue, green, purple, dark and blond
The technique of balayazh, at which mixing of several shades of paint is used and giving the hair a particularly color with a smooth transition, is also available at home. However, for this you need to clearly understand what should happen and it is better to first consult with professionals. At home it is difficult to paint the head in such a way and if you are not confident in your abilities, it is better not to start.
Ombre style and feather hair ends
Another complicated hair dyeing method is an ombre style. In this case, the overflow is made from the tips of the hair to the roots, from the light shade to the dark. Such a hair looks very impressive, especially when the feather effect is added to it (selective milling or coloring of individual strands). But again, such a procedure is very complicated at home and requires professionalism, so it is better to contact the salon.

Color change without paint - henna, brilliant green, peroxide
Hair coloring at home is often carried out without the use of synthetic dyes of different brands. Some people resort to folk remedies, lighten them with peroxide (this option is dangerous), others manage to achieve amazing results with green paint, but the most benign and safe method is. This natural component in addition to giving the hair a golden hue, nourishes them with vitamins and trace elements.
 Change hair color - try yourself in different images
So do not be shy, dye your hair at home, adhering to the main rules and advice. But do not go deep into the experiments, they often do not bring to good.
How to dye hair professional paint at home?
Is an oxidant necessary? (I want about 2 tones lighter) and how much does it need for 1 paint?) well, or whatever it is in quantity .. and what better paint (+ approximate cost =))
Gelena
Oxide is necessary, paint bleaching is possible only on previously unpainted hair, the paint can be any (professional) that suits the cost and color (150-1200 rubles) for one 60 ml tube you need 60 ml of oxide, unless the annotation says another it is possible). Be wary of unwanted shades, to neutralize which you will need mikston.but in order that the head would not hurt, go to the hairdresser with your paint and oxide, they will do everything there and in which case there is an opportunity to correct an undesirable result)))
Vladislav Semenov
My advice to you - do not bother with professional paint, buy a regular one, with an aunt on the box. Professional paint is a thin piece, if it is wrong to choose a shade (it is necessary to select not by strands in the map, but by number), it is wrong to assess the natural tone of hair, to choose the wrong oxygenant, very unpleasant surprises can happen.
Feedback on how to dye your hair at home on the example of Estel Essex. How to choose the percentage of oxidizer, how to dye your hair, paint schemes, step-by-step instructions and a lot of PHOTOS.
Many women dye their hair at home. For various reasons - someone does not have enough money, someone does not trust the hairdresser, someone craves handwritten experiences =), but nevertheless, there are a lot of us. Often, all such experiments end sadly and you have to go to the salon to correct everything. I hope that my review, based on years of experimentation and experience, will help you get closer to the desired result =) Since I have been painting for many years exactly paint Estel Essex, the painting example in my review will be exactly the paint of this brand.

Some lyrics(you can skip this paragraph)
My experiences began about 15 years, that is, more than 16 years ago. Only at school I had time to try out the most varied shades of red, red, I tried to be lit and lightened =) All this was not on my own, but with the help of my wonderful mother, who was always ready to help me in my search for beauty =)) However, these experiments ended often unsuccessfully, because Neither me nor my mother had any consideration in this area (and there was almost no Internet at that time), and everything was cognized through experiments with cut hair. Then there was a short period of rest for my hair (I cut my hair short and grew my color), but we continued to experiment with mom, since she wore a short haircut and confessed the principle “grow back, not teeth” =)) Of course, sometimes I visited salons to to fix absolutely ruined hair color, or simply in the hope that the pros will do something like “AH!” to me. Well, then I went to study at the hairdresser and found out what was happening =) Naturally, now I paint myself only, but using decent experience and knowledge, and having an excellent result.
My first “salon” experience was exactly with Estelle's paint (then, in my opinion, not Essex, but it doesn’t matter) and this experience was definitely successful, and my long love for this paint began =)
Later, when I started working as a hairdresser, to my satisfaction, Estelle was one of those with whom our salon worked, and I was able to learn all the colors and nuances of use up and down =))
During this time, I certainly tried other paints (mostly on myself), such as Schwarckopf Igora Royal, Wunderbar, L'oreal Professionnel. Of all the listed I really liked Wunderbar, but it costs almost twice as much. For some reason, Schwarzkopf did not impress me, although the paint was also not bad, but I didn’t grow together with colors there.
So, the advantages of Estelle:
- Low price. Cheaper paint I have not met, professional, of course =)
- A large number of shades (let alone special ones), in contrast to the same Igora, the shades are very appetizing, I could always choose the right one for myself and the client.
- When mixing colors always give a predictable result, the only paint with which I venture to mix everything "by eye" (although I do not recommend it to anyone)
Of the minuses.
- Gray does not paint over very. On thin hair with gray hair 30% will be normal, on hard hair with gray hair more than 50% is not very. Not that it doesn't paint, but gray hairs are highlighted. Quickly washed out of gray. That is, if you have problems with painting gray hair, it is better to choose a different paint (but it is better to try and draw conclusions).Although my mom still makes up for her, and she has just the second option, maybe I’m too demanding =)
- Some hairdressers believe that Estelle dries hair. My opinion - depends on the hair. Personally, I do not dry out (I use it for 5 years without a break, and before that periodically), given the constant hair dryers and irons. But there is hair that this paint does not suit. Again - you have to try.
- I'm not very happy with the smell, which lasts another day after staining. Wunderbar, for example, is not so strong.
Paint composition and packaging information:

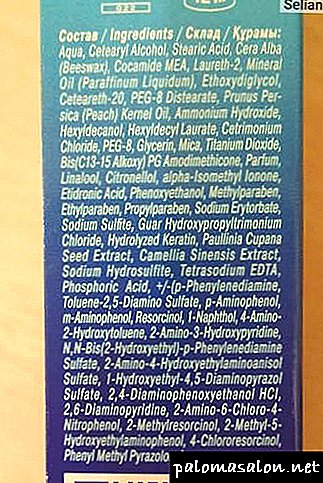


I will not comment too much, because the paint thing by default is not useful, it means there’s nothing to be found in the utility either =))
What you need to know before you decide on a home painting?
There are cases that just need to leave the professionals. For example, complex clarification, ash blond, highlighting, a dramatic change in color in any direction (for some reason it is considered that it is very easy to dye out from light to dark). All these actions imply at least basic knowledge of the process, practical experience and nuances (if the first two points are often present, then the latter is usually available only to professionals =)
Of course, if you are more interested in the process, rather than the result, then you can take a chance and try, but be prepared for a negative result.
How to choose the right percentage of oxidizer in order to minimally harm the hair and achieve the desired result?
1.5% oxidizer activator (this is only Estelle as I recall). Used for toning on previously bleached hair. That is, first you lighten the hair with powder, and then tint it with ordinary paint using 1.5% oxide. The only difference from the standard painting is that the oxide is taken in a 2: 1 ratio, that is, the oxide is 2 times more than the paint. Tinting with this oxidizing agent is the most gentle for bleached hair. Naturally, gray hair does not paint over.
1.5% oxidizer (simple, not activator). If not Estelle, then everything as in the previous paragraph + can be used to tint natural hair (not dyed), it turns out very gentle painting, but you need to choose shades of your tone level (that is, not lighter and not darker). Gray hair does not paint over.
3% oxidizer. When painting in tone to tone 1-2 shades darker, or 1 tone lighter (and that is unlikely, if only not completely dyed hair), gray hair does not paint over.
6% oxidizer. For painting in tone with tinged with gray hair, or 1-2 tones lighter. You can also use it to lighten the strands (I will not even write for highlighting, because highlighting at home is nonsense =)
9% oxidizer. For painting 2-3 tones lighter gray paint over. But I do not recommend using 9% at home!
12% oxidizer. Don't even approach him! =)
These are very general rules.It is absolutely impossible to paint all the cases when and what to use. As you noticed, I did not mention the cases of painting 3-4 tone lighter or darker. There are always nuances, and I repeat, leave the complicated painting to the hairdressers =)
For comparison, in the majority of ready-made paints in light colors, 9-12% oxidizer are used =)
!!General rules!!
If we dye completely natural hair.
- Tone to tone (meaning lightness of hair, not shade) - try 1.5%, if there is no result or you need a bright shade, then 3%.
- 1-2 tones lighter - 6%
- 3-4 tones lighter - 9% (or better yet, do you really need it? =))
- 1-4 tones darker - 3%
- Natural hair we paint - first the length and only then the roots! This is mandatory, because the roots have a higher temperature and if they are painted first, they will be much different in color. For long hair it is quite difficult to do, so I advise going to the salon =))
If a we change color of already painted hair.
- 1-4 tones lighter. First you need to clarify. Sure to! I know that some people manage to lighten the paint immediately, but for this you need to take 9-12% oxidizer, and believe me this will have a very sad effect on the quality of the hair, and the very result of the dyeing. I do not recommend lightening on my own either. complicated! If you take, do not take more than 6% oxidizer, and then be sure to tint with 1.5%.
- 1-2 tones darker. Use 3% dye.
- 3-4 tones darker. If the hair was lightened, then I do not advise you to dye yourself; It is necessary to do prepigmentation.Lightened hair absorbs a lot of pigment, moreover, unevenly, the color will turn out faded, plus the layering of shades can give a green or other undesirable shade.
- If you have grown roots more than 1 cm, then they need to pick up their shade and oxidizer, it is better not to contact, because It is impossible to color the natural hair in the same color and it is unreal and you can get a big difference in shades.
- With gray hair coloring. We take 6% oxidizer.
- Without painting gray hair. We take 3% oxidizer.
- I hope no one would think to paint the roots separately by 2-3 tones lighter or darker =))
Regarding the choice of shades.
All the ashy shades are complex (unless you are dyed to match the natural hair), the lighter, the more difficult to achieve the desired result, so if you do not want to walk with a green or blue head, it is better to leave them to professionals.
For home use are good red and red shades (because it is the color of the natural pigment of the hair and it is not necessary to interrupt). It is also easy to achieve results with golden and purple hues. Naturally, blondes with beautiful tints do not include here =)
Ideally, of course, shades that are within +/- 1-2 tones from your native color are suitable for home coloring.
How to paint at all.
I only dye the roots, so they look BEFORE dyeing (hair, excuse me, not too clean, I don’t dye clean, so the skin is less injured) My natural hair color is 7/0, that is, I will dye the roots 1 tone lighter.

- We take the paint and squeeze it out of the tube into a plastic or ceramic dish. 0.5 tubes are enough for painting the roots, but keep in mind that the paint is thick (non-professional usually liquid on the contrary, so that they are easier to apply), so the first time it is better to dissolve more.
 We weigh paint on the scales. Proportions with an oxidizer 1: 1, that is, how many grams of paint, so much oxidizer. (an exception is for toning the proportion of 2: 1, i.e., the oxidizing agent is 2 times larger). I do not use weights, but I focus on consistency, but I still have professional experience and very good training in this area, so you don’t do it =)
 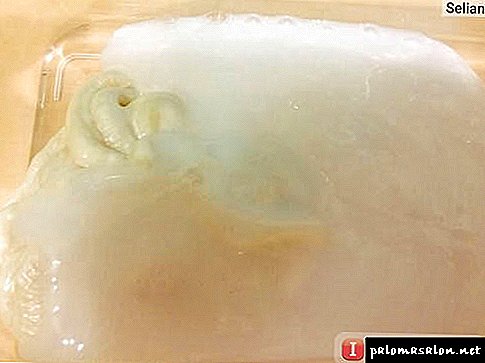 By the way, the oxidizer can be mixed, if for example, I have 9% and 3%, then by mixing them in a ratio of 1: 1 I will get 6% - I use exactly 6%, because I have a little gray hair (but this can be done only for those who are at odds with math and in general understands what I am talking about).
 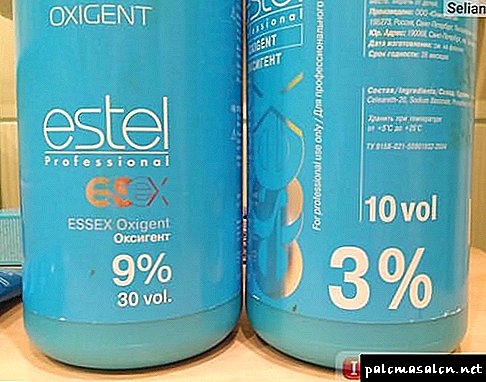 I mix it for the reason that I need different percentages, and buying a bunch of liter bottles is expensive and pointless, a couple is enough, you can even have only 9% and 1.5% or 6% and 1.5%, but this is already home barber level 98 =)))
 - Stir the paint very good and thorough! Do not be lazy =) You can stir with a brush, which you will paint (although not everyone approves of it). I have a brush like this

 I strongly advise you not to use these, it is short (hard to hold with gloves), the surface is hard and small, in general, a nightmare =) It is better to buy a brush in a professional store, for ordinary dyeing (roots / length) it is better to take a wide and medium hardness.
 - Getting to the staining. Immediately! No "let it stand a little, ammonia disappears," and so on.
- How to paint. You can paint chaotically and as horrible (as mom and I did before I went to study =)), and you can use various convenient schemes that will save time and not miss a single centimeter. I'll show you 2 schemes of applying paint, for long and short hair.
 We weigh paint on the scales. Proportions with an oxidizer 1: 1, that is, how many grams of paint, so much oxidizer. (an exception is for toning the proportion of 2: 1, i.e., the oxidizing agent is 2 times larger). I do not use weights, but I focus on consistency, but I still have professional experience and very good training in this area, so you don’t do it =)
  By the way, the oxidizer can be mixed, if for example, I have 9% and 3%, then by mixing them in a ratio of 1: 1 I will get 6% - I use exactly 6%, because I have a little gray hair (but this can be done only for those who are at odds with math and in general understands what I am talking about).
  I mix it for the reason that I need different percentages, and buying a bunch of liter bottles is expensive and pointless, a couple is enough, you can even have only 9% and 1.5% or 6% and 1.5%, but this is already home barber level 98 =)))
 I strongly advise you not to use these, it is short (hard to hold with gloves), the surface is hard and small, in general, a nightmare =) It is better to buy a brush in a professional store, for ordinary dyeing (roots / length) it is better to take a wide and medium hardness.
- For long:The hair is divided into 4 parts by two partings - from ear to ear through the crown and from the middle of the forehead to the lower part of the nape, as can be seen in the first figure. We get 4 zones orange slices, 3 in front and 2 behind.
 Now we divide each zone of the lobules with 1 cm thick partings starting from the top of the head (as shown in Figure 2) into plates, which we paint.First we paint the roots of each plate, we fold the plates into a pile in the center (this is very convenient for beginners), then, when all the roots are painted, we disassemble the plates from the pile and start painting the length in the same order (if necessary, of course, and do not forget that if the hair is natural, we begin the opposite with the length). Zones can be painted in any order, I paint one plate from each zone and fold it to the center, then again one, and so on in a circle, it turns out more evenly.
 - For shorter:
 Now we divide each zone of the lobules with 1 cm thick partings starting from the top of the head (as shown in Figure 2) into plates, which we paint.First we paint the roots of each plate, we fold the plates into a pile in the center (this is very convenient for beginners), then, when all the roots are painted, we disassemble the plates from the pile and start painting the length in the same order (if necessary, of course, and do not forget that if the hair is natural, we begin the opposite with the length). Zones can be painted in any order, I paint one plate from each zone and fold it to the center, then again one, and so on in a circle, it turns out more evenly.
The hair is divided into 4 zones (best seen in the bottom figure) - the parietal zone, temples and the back of the head.  The parietal part is divided into plates (as shown in the figures), the temples are divided into vertical partings, and the back of the head - horizontal (if difficult, the back of the head can be divided into 2 parts). We start to paint from the 1st zone, then the temples, then the back of the head.
Here I paint my hair according to the 2nd scheme (the truth is on my temples I have horizontal partings, for a hair of medium length it is more convenient)


Paint applied tightly, driving it into the hair, do not spare the forces =) Do not save the paint, it should be visible on the hair, it is an important component of a good result!
We paint the edge wellIf you wear a tail, regardless of the application scheme, it is better to paint over the edge along the entire perimeter. Here we are not afraid to get on the skin, then rub it harder =)
If a paint got on the skin (in any other place) - wash off immediately and thoroughly. If you hit the clothes - immediately sprinkle with hairspray and send in the wash (I wash everything)
We hold the paint according to the instructionsI keep Estelle 35 minutes, lighter shades can be 40 minutes. If you overdo it, the color may be darker. With a painted head you can not be near heating devices, in direct sun, in a draft (or go outside to smoke), in general, no climatic influences!
We wash off.Very carefully! We pay special attention to the edge (I think no one likes smeared skin). First, just with water, then with shampoo, and again with shampoo. Be sure to balm and preferably - a mask.
Here's how I washed my boundary


This time my roots came out a little darker than the length, because the length had time to burn out (and plus there are clarified strands there). I was painted with a touch of 8/74 Estelle Essex (I have been painting them for a long time and only make up the roots).
Yes, and about mixing shades.
Probably I do not recommend it =) A sufficient number of colors of various shades are being sold so that you can choose the one that suits you. If not satisfied level tones, then you can take 2 different levels with one shade and go to the middle one, it is better not to mix the shades between them (well, or in extreme cases, those that are nearby are red + golden, red + brown, etc., and do not golden + ash for example =)). Remember the basic rules for mixing colors: yellow + blue = green, etc. =)
I hope my feedback was useful to you, if you have questions, suggestions, amendments, I will be glad to see them in the comments =)
Be beautiful! =)
My other reviews on hair care:
Great and detailed review about hair care.
My prof. hair dryer Moser Ventus
My prof. iron Babyliss Pro
Prof. thermal protection OSIS + Schwarckopf
Prof. Muss for styling Schwarzkopf Professional Silhouette
Olivia Garden Ceramic Brush
Shampoo and balm from Agafya
ORGANIC SHOP Hair Oil Jojoba
The people, where better to dye your hair at home or in the salon with professional dyes?
Professional paint is better than that sold in the store?
Lus
In the salon - the selection of color is very delicate, the fact that almost any hairdresser will do it better than you no doubt, and here it does not even depend on the paint, but on the knowledge of the master. And if you're lucky, you can get it to a professional painting, then in general everything will always be perfect.
Karina Solovyov
I always paint in the cabin. Firstly, I am too lazy to try and color all the hair so that the color turns out to be uniform, and secondly ... secondly, probably, too, laziness =)
And in general it seems to me that the master will paint better and at the same time no labor costs will be required from you.
and then another from this paint to wash the bathroom, wash towels.
Anna
It is better to paint at home if the shade of paint is close to the natural, hair is not very long, there is no ashy shade in the paint. In other cases - it is better in the cabin, at least the first couple of times, further, when a radical change of image occurred - it is possible at home, using the same paint (preferably).
Favorite
Yulia, it is better to dye your hair in the Beauty Salon with professional dyes, there you can buy shampoos and balms of the same series for dyed hair, so that the dye on your hair lasts longer, it is brighter.
With professional hair coloring less injured.
You can save money - come to the Beauty Salon with your paint (purchased in the store, on the wound, etc.), but in this case, the Salon masters are not responsible for the quality of coloring.
You can save even more - staining the house itself, but your hair will be different, in the worst case, the masters will have to fix your home coloring in the Salon, perhaps it will cost more.
. My Salon works on Dutch paints KEUNE.
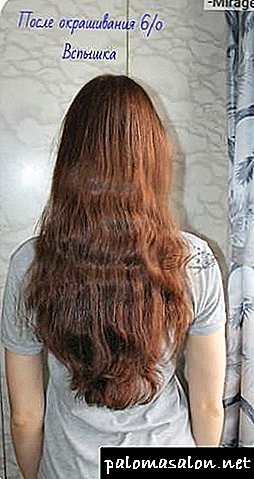
★ ☆ Professional paint, which showed itself in two ways, it all depends on the shade. Shades 6/0 Dark blonde and 6/71 Dark blonde brown and ash. Detailed photo report BEFORE and AFTER, as well as after TWO WEEKS and MONTH after dyeing ☆ ★
ღGood day!ღ
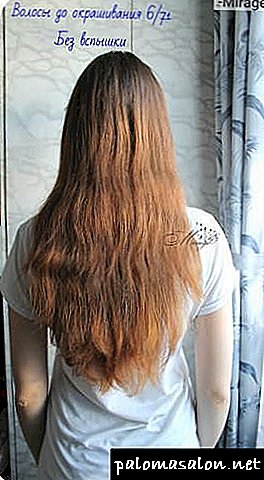
About a year ago I made a promise not to dye my hair and grow my natural color, but a year later I still fell off, having grown 10 centimeters of native color. And all because I did not like this terrible rusty shade of my dyed hair. Well, I can not tolerate the redhead in my hair, and especially their red color!
The roots and length were noticeably different, I doubted for a long time, but still decided to paint myself. Girls, such girls.
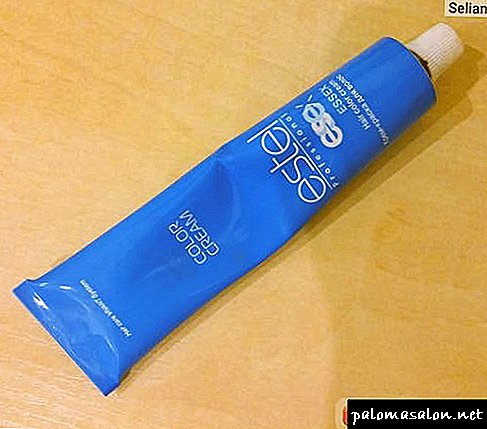
I no longer wanted to paint with paints from the mass market, because the result is not always predictable, although I learned not to look at the shade in the picture, but at the paint number (You can read more about how to choose paint by number here). But I decided to buy this time professional paint, albeit from the budget section of the professional. The choice fell on Hair dyeEstelProfessionaEssexColor cream.

Price: about 100 rubles.
Volume: 60 ml.
Place of purchase: Hitek store.
I want to immediately notice that in professional paints everything is bought separately, so you will need to buy hair dye, oxidizer and gloves.
Oxidizer I took 3%. Its price was about 50 rubles for the volume of 60 ml.. My gloves were at home.
● • Packaging • ●
Packaging of hair dye reminds packaging of toothpaste or cream. A small elongated box in which there is a tube of paint and instructions.

I really like the design of the box in the form of a gradient, and the colors are pleasant to my eye.
The tube is standard for hair dye, the neck is sealed with protective foil, which is easily removed by the back end of the cap.

The oxidizer is in a small bottle, with the same design. His mouth is wide and there are no protective devices. Just need to unscrew the cover and pour the contents.

● • Aroma • ●
Hum, if you can call it a scent.
The paint smells like ammonia very much; during the stains I even had watery eyeswhich was not the case with other paints, therefore I strongly recommend staining in a well-ventilated area.

● • Consistency and color • ●
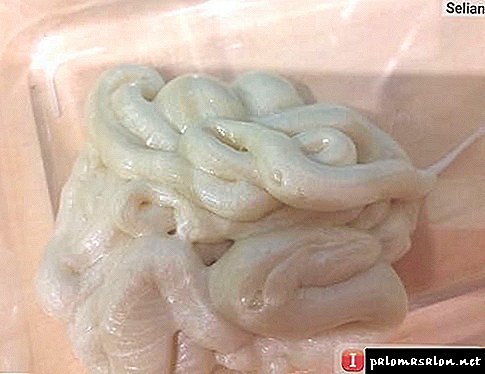
The paint is quite thick., even in mixture with oxidant it is applied and spread through the hair quite hardtherefore I slightly diluted ready mix with boiled water. Then it goes much better.
The color of the paint depends on the chosen shade, but in all of them there is a huge amount of pearl particles of unknown purpose, because they do not do anything except a pretty-magic paint.In the process of dyeing the mixture darkens depending on the shade.
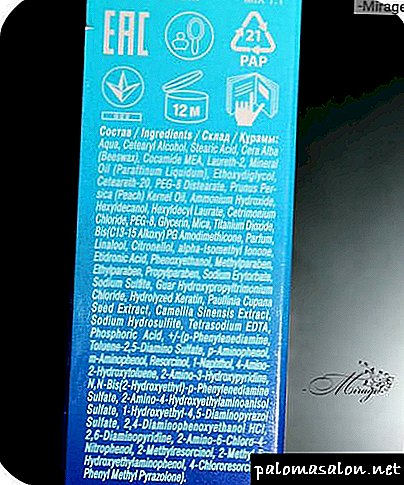
● • Composition • ●
I do not understand paint formulations, therefore for those to whom it is important and necessary I simply attach a photo.
The composition of the oxygenator on the bottle is not specified, so I do not have it.
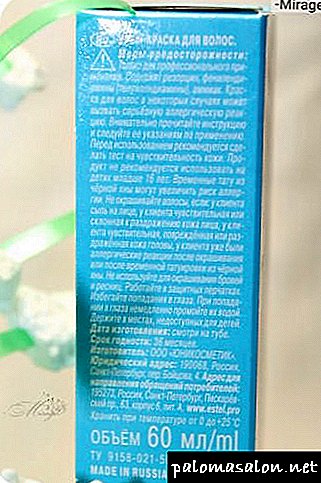
● • Instruction • ●
Roll the mouse wheel to zoom in on the photo.


● • About my hair • ●
My hair is medium length, normal at the roots and dry at the tips. The tips are fluffy and often split, although I often cut them and use nesmyvashki. The hair itself is porous and wavy, dyed several times, but the color is close to my natural one. When the humidity starts to push. Their thickness and thickness are average.
● • Warnings • ●

● • My impression • ●
☑ HUE 6/71 DARK-RUSAL BROWN ASH.

I wanted to get on my red-rusty horror cold and dark brown. I chose by the number of paint, reviewed the entire palette on the Internet, re-read a bunch of reviews and stopped at 6/71.
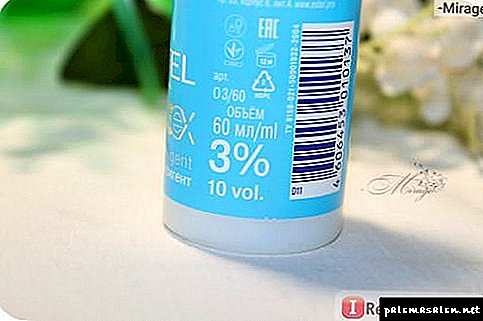
Oxidizer, I decided to take 3%, because, for my reasons, it harms the hair less, moreover, the instructions say:
Coloring tone to tone, clarification on one tone (in the radical part) or darker on one tone
This is exactly what I needed, since a higher oxidizer number gives a higher figure of hair lightening.
On the one hand, a stronger brightening should give a darker shade, and on the other, then, as the paint is washed away, the hair will be much lighter than the original shade.
Knowing people, correct, if I was mistaken in something.
So, I covered the battlefield with a newspaper so as not to mess the table, mixed paint and oxidizer in a 1: 1 ratioput on gloves and started applying paint. At first I tried to apply the mixture with a dyeing brush, but then I spat on it, because it was terribly inconvenient and just scooped up the paint with my fingers, spreading it over my hair. Sometimes she combed them with Chinese Tangle Teaser for a better distribution of paint.

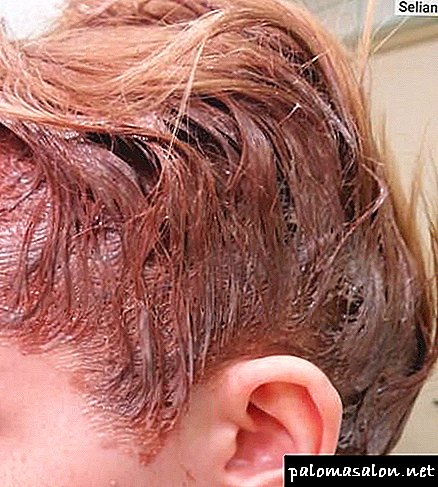
At first I dyed the ends of the hair, gradually moving towards the head., since I read that due to the heat of the scalp, the dye on this area of hair is “taken” faster.
As the paint remained in the air for a long time, it acquired a purple-eggplant shade.so that at some point I was scared, would I really be violet?

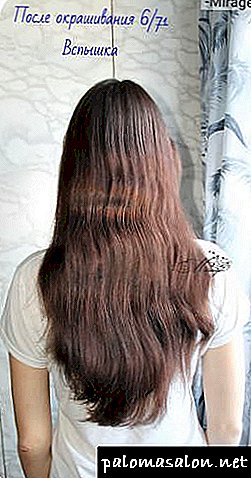
However i'm honest held out for 35 minutes, as written in the instructions and went to wash off the paint. In the shower, I slightly dampened my hair and "chewed" them, after waiting another five minutesand then began to wash the mixture from the hair.
At first I just rinsed my hair, then washed my hair with shampoo for two times, and then put on a mask. The water flowed violet like ink, so I seriously began to fear for the shade of my hair.
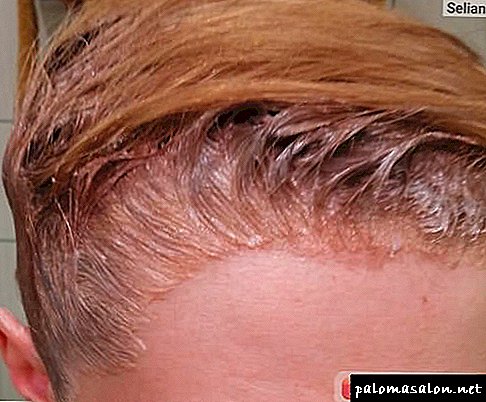
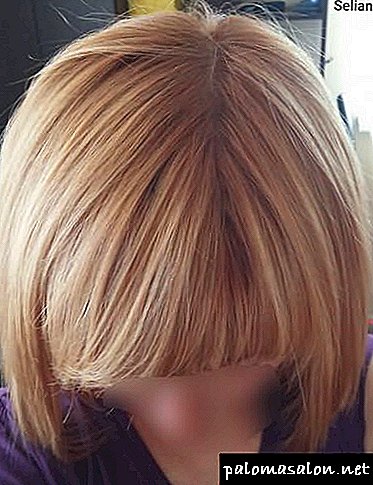
However, after drying these, I was incredibly happy, it turned out exactly what I wanted! Delight knew no bounds! BUT the hair itself was soft and very shiny. Even the tips weren't too hard..
Color lay evenlybut the roots were slightly colder in shade than the rest of the length. But it was noticeable only in good light.
At university, I heard a bunch of compliments about the new hair color, and the words that this color is much better to me than the previous one. Need I say how joyful I was?
❖Perhaps we should go to the result:❖


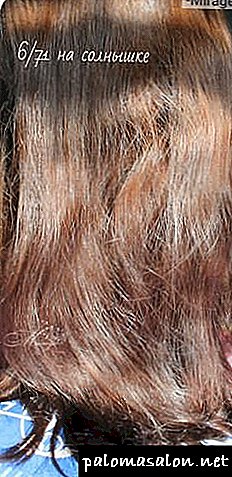

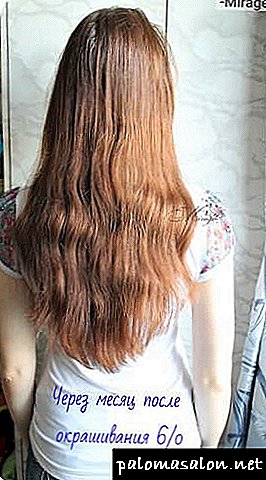
Only one thing darkened me the color just flew away from my hair, immediately flushing all the same red. Two weeks later, he washed off almost half. And I wash my head only twice a week, i.e.and 4 shampoos the paint is half washed off. Ugliness! It is worth noting that I did not use the products for colored hair and color protection.
This is how the hair looked after two weeks:

The tips after the first coloring felt more or less, the hair was also in good condition.
I waited two more weeks to now dye my hair colder and darker.
This is how my hair looked after a month after dyeing (only washed my head 8 times):

Everything returned almost to the same from what it began. But this time I decided to experiment and buy a 6/0 shade.
I will show collage for clarity - BEFORE → AFTER → THROUGH A MONTH

☑ HUE 6/0 DARK-RUSAL

I hoped that it would be darker and colder, since it contained only one basic shade of “Dark Brown”. Almost like my natural, only slightly darker.
I also took 3% oxidizer and one paint box.
I always dye my hair in one box, I have enough, even though I have long hair.

Everything was done according to the scheme above. I also diluted this paint a little with water, as it turned out to be thick. As the mixture was dark, it turned dark brown, so I was even afraid that the shade would be darker than I wanted.

After 35 minutes, I went to wash the paint off the hair. I also wet my hair, “grinned” them and waited 5 minutes, and then washed it off. I washed it twice with shampoo and put on a mask.
After drying my hair I was disappointed. The tint is almost unchanged. He became only a little more evenly and added shine. It was terrible. I just threw away the money and once again “straightened” my hair. There was no limit to my frustration, but I had to go through the whole month so that I could paint my hair again, but with a different color and shade.
❖Perhaps we should go to the result:❖


There was no place to wash off this paint, but all the same it podmylyas.
This is what awaited me a month later:
And a collage for clarity (if you can see the difference at all) - BEFORE → AFTER → THROUGH A MONTH

● • Advantages • ●
☆ Easy to use,
☆ A rich palette of shades,
☆ Does not spoil the hair (although dry ends still suffer),
☆ Gives strong shine to hair,
● • Disadvantages • ●
★ You need to have the knowledge to correctly choose the shade and oxidizer (or ask a consultant),

● • Total • ●
In general, I am pleased with the paint by 4 points. I understand that maybe something was my fault, but the paint itself is good, it hurts the hair to a minimum, the shades are almost the same as in the palette, but I advise you to consult with experts when using professional hair dye.
Personally, I still like professional paints more than mass-market paint, since they have a richer choice of colors, it is possible to choose the desired percentage of oxidizer. A budget professional costs the same as the masses.
More about my experiments with hair:
- A horror film with blood in the shower or a tinted shampoo Irida.
- Ketchup on hair or tonic.
- The paint, which was washed off for almost a year, with a detailed photo report.
- And the paint that washed off almost instantly.
- Cheap analog expensive colors or how to choose the right hair dye.
ღThanks for stopping by!ღ
You can get away from red with yellowness, with the right approach. Tone 9.16
This review should not be regarded as a universal recipe for an undesirable shade on the hair. Each case is individual, but yours may be similar to mine)
Everyone who dwelt in a blond of natural dark, or even more so out of the black acquired, knows what red hair is.
In general, I am not against redheads, and after carefully washing the dark hair off, I didn’t even fight it. But I wanted to drastically change the image and go out in my own color.
Further, general information. So that the review was not so much about how I painted, how much about how I chose what to dye my hair.
As known, the color "as on the pack" is an indicator Togo, what pigment in it, and how it looks on a neutral basis. not more (although not everyone knows this, and I want to shout about it under each review “I’m not in the catalog”)
And in order To get the desired color you need not to choose the color in the catalog as you want, and in the color wheel to choose shades as opposed to undesirableand purchase them. If you decide for yourself to make your color the way you want it, then I ask you, BEMILE! Use this simple but practical advice! Color circle.Just choose the colors that are opposite to your "hostile unpleasant" color!
Then it is the choice of the percentage of oxide. Tinting to give shade? 1.5%. Tone to tone-3%. A couple of tones lighter-6%, from dark to light-9%. 12% forgive. Not for home use.
Further, the numbering. The first digit to the point is the color depth, in gradation 1 is the darkest, 10 is the lightest. The second and subsequent ones are exactly the shade we need. Which is intended to fight the fact that we do not want to see in ourselves. The first after the point is the main color accent, the second is secondary. About the meaning of numbers
In the case of getting rid of red-yellow (rarely it is clearly one way or the other), I decided to choose a color a little lighter, I needed 7-8, and I chose 9 because the blue and purple undertones give a shade. In the fight against the ginger stands subton 1-blue. You can also add special mix tones. But I decided to limit myself to a simple choice. Against yellow-purple-6. Yellow on my hair was less than red. This was due to the choice of shade-9.16. Oxide-6%, time-35 minutes.
About paint-on quality, I have no complaints. If all colors for your hair are chosen correctly, then everything will be completely expected. The smell is normal, like any other paint, where fragrances do not overshadow the smell of chemistry. No paint has ever burned my skin too much, or I don’t remember anything like that. It does not flow through the hair and from the brush, it overlays the strand even with some thickness, I do not rub it into the hair. View tube and oxygenator-attached)  Already after use.
The exposure time is 35 minutes, somewhere around 20 minutes I washed the end of the strand to see if it was possible to wash it off early. If you find a result that may go further in the wrong direction, flush it.
Here is what came before 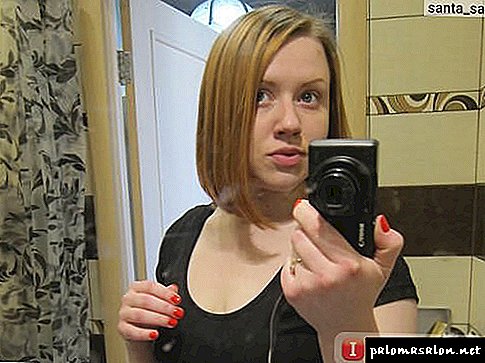 Before. Artificial lighting
  Before. Daylight. Root Difference - Same Color
During  I didn't paint the roots.
After  After, artificial.
 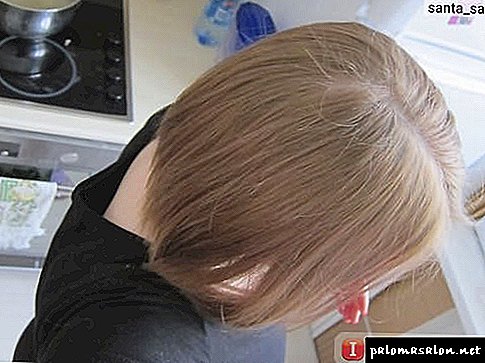 After-day. Difference of roots and color is missing
The story of what was at the very beginning, and how I washed the color from the dark here
For purchase, I definitely recommend this paint. But my main advice, if you do not know what and for what result you want to take on the counter with dyes, then go to a professional. So that you do not grieve over the beauty of your hair looking in the mirror, and do not sift out a high-quality cosmetic product that you did not use correctly.
Be beautiful, and take care of your hair from rash manipulations!)